
Sarah Artz is the super cool founder and owner of One x One Thousand, a creative space for handcrafted artists, makers, designers and hobbyists.
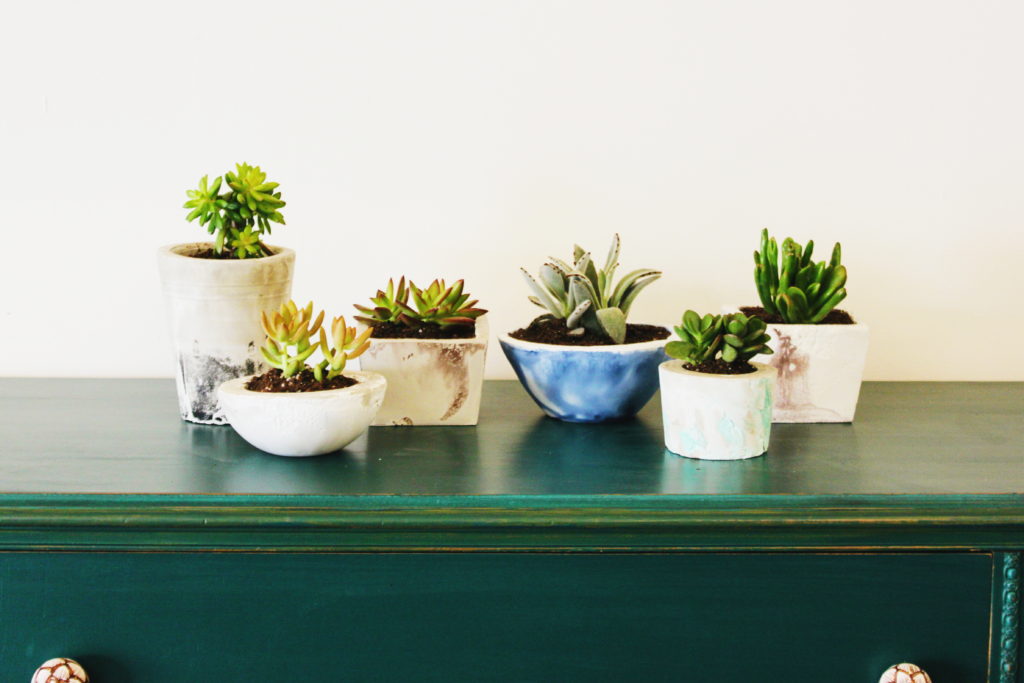
The following is Sarah’s personal plan for making sturdy DIY Succulent Planters from scratch. Read on and learn how to make your own cute succulent planters!
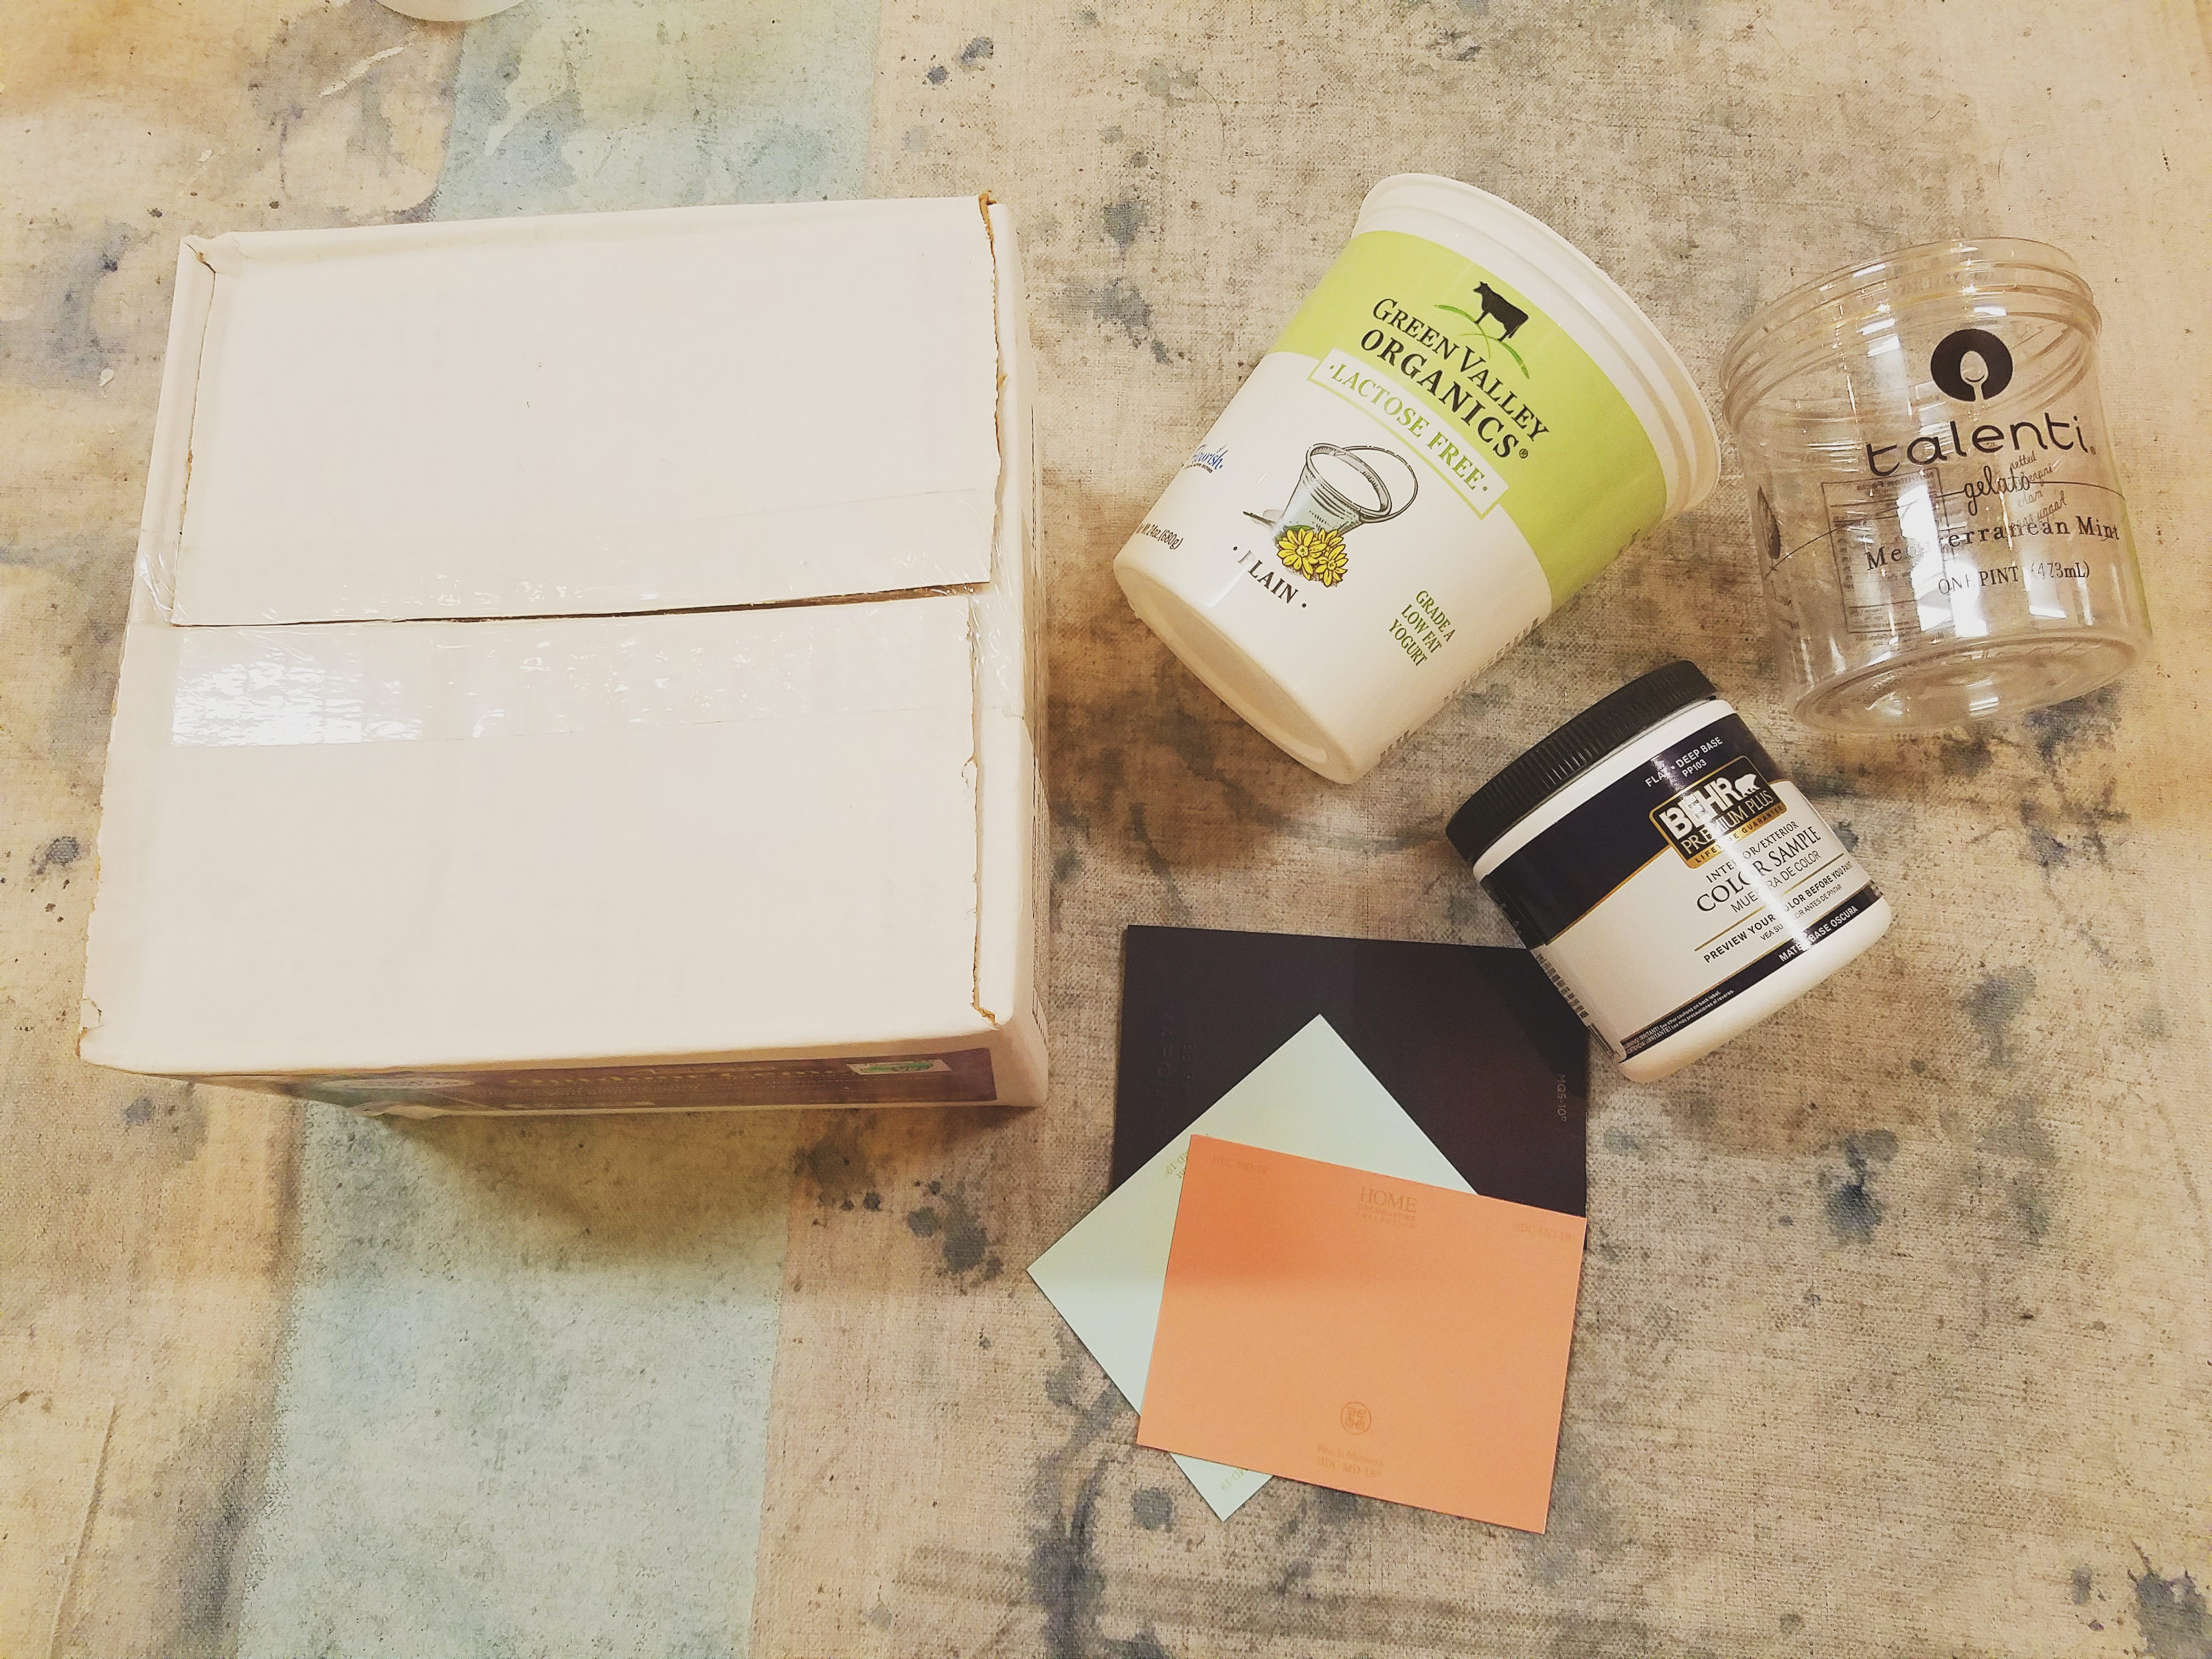
Supplies Needed to Make DIY Succulent Planters
- Concrete
- Recycled Empty Plastic Containers. You will need larger ones and also smaller ones that will full fit inside your larger size. Each planter will need one large and one small container.
- Sandpaper
- Paint
- A pencil
- A Pair of Scissors or Box Cutter
- A 5lb Weight – A Paint Can or Stack of Books will work too.
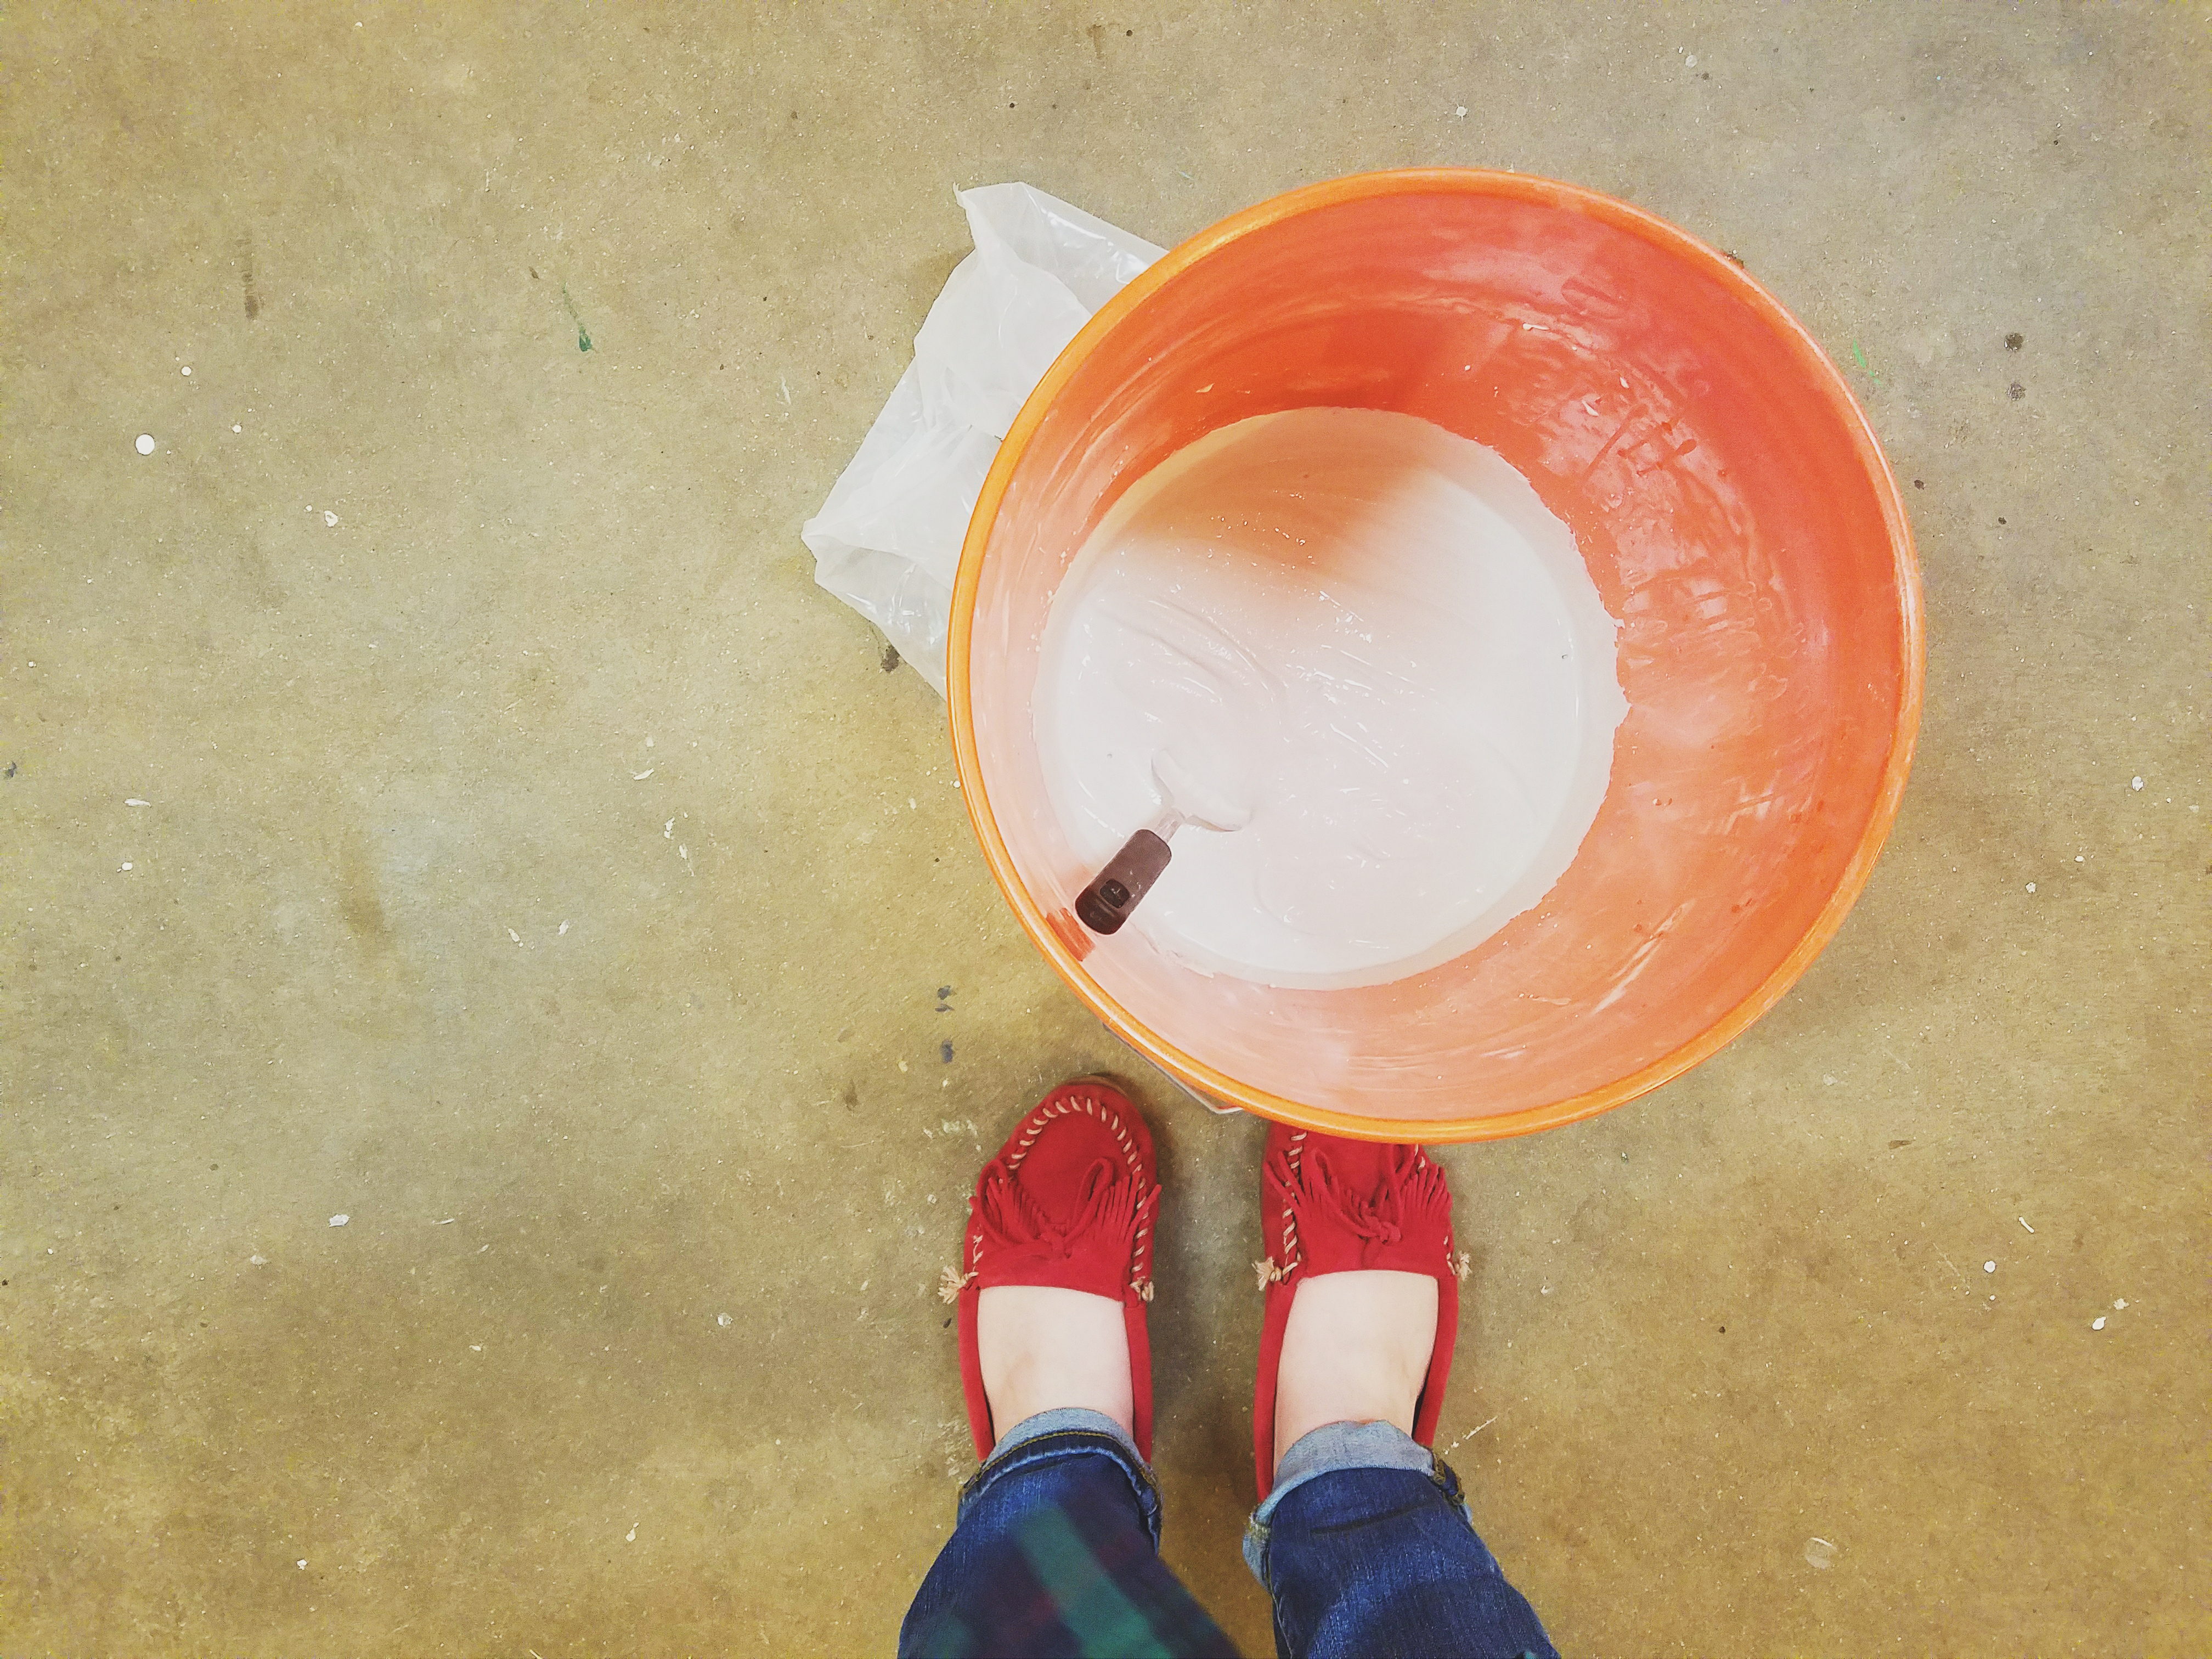
Step 1: Mix up your concrete with water based on the package instructions.
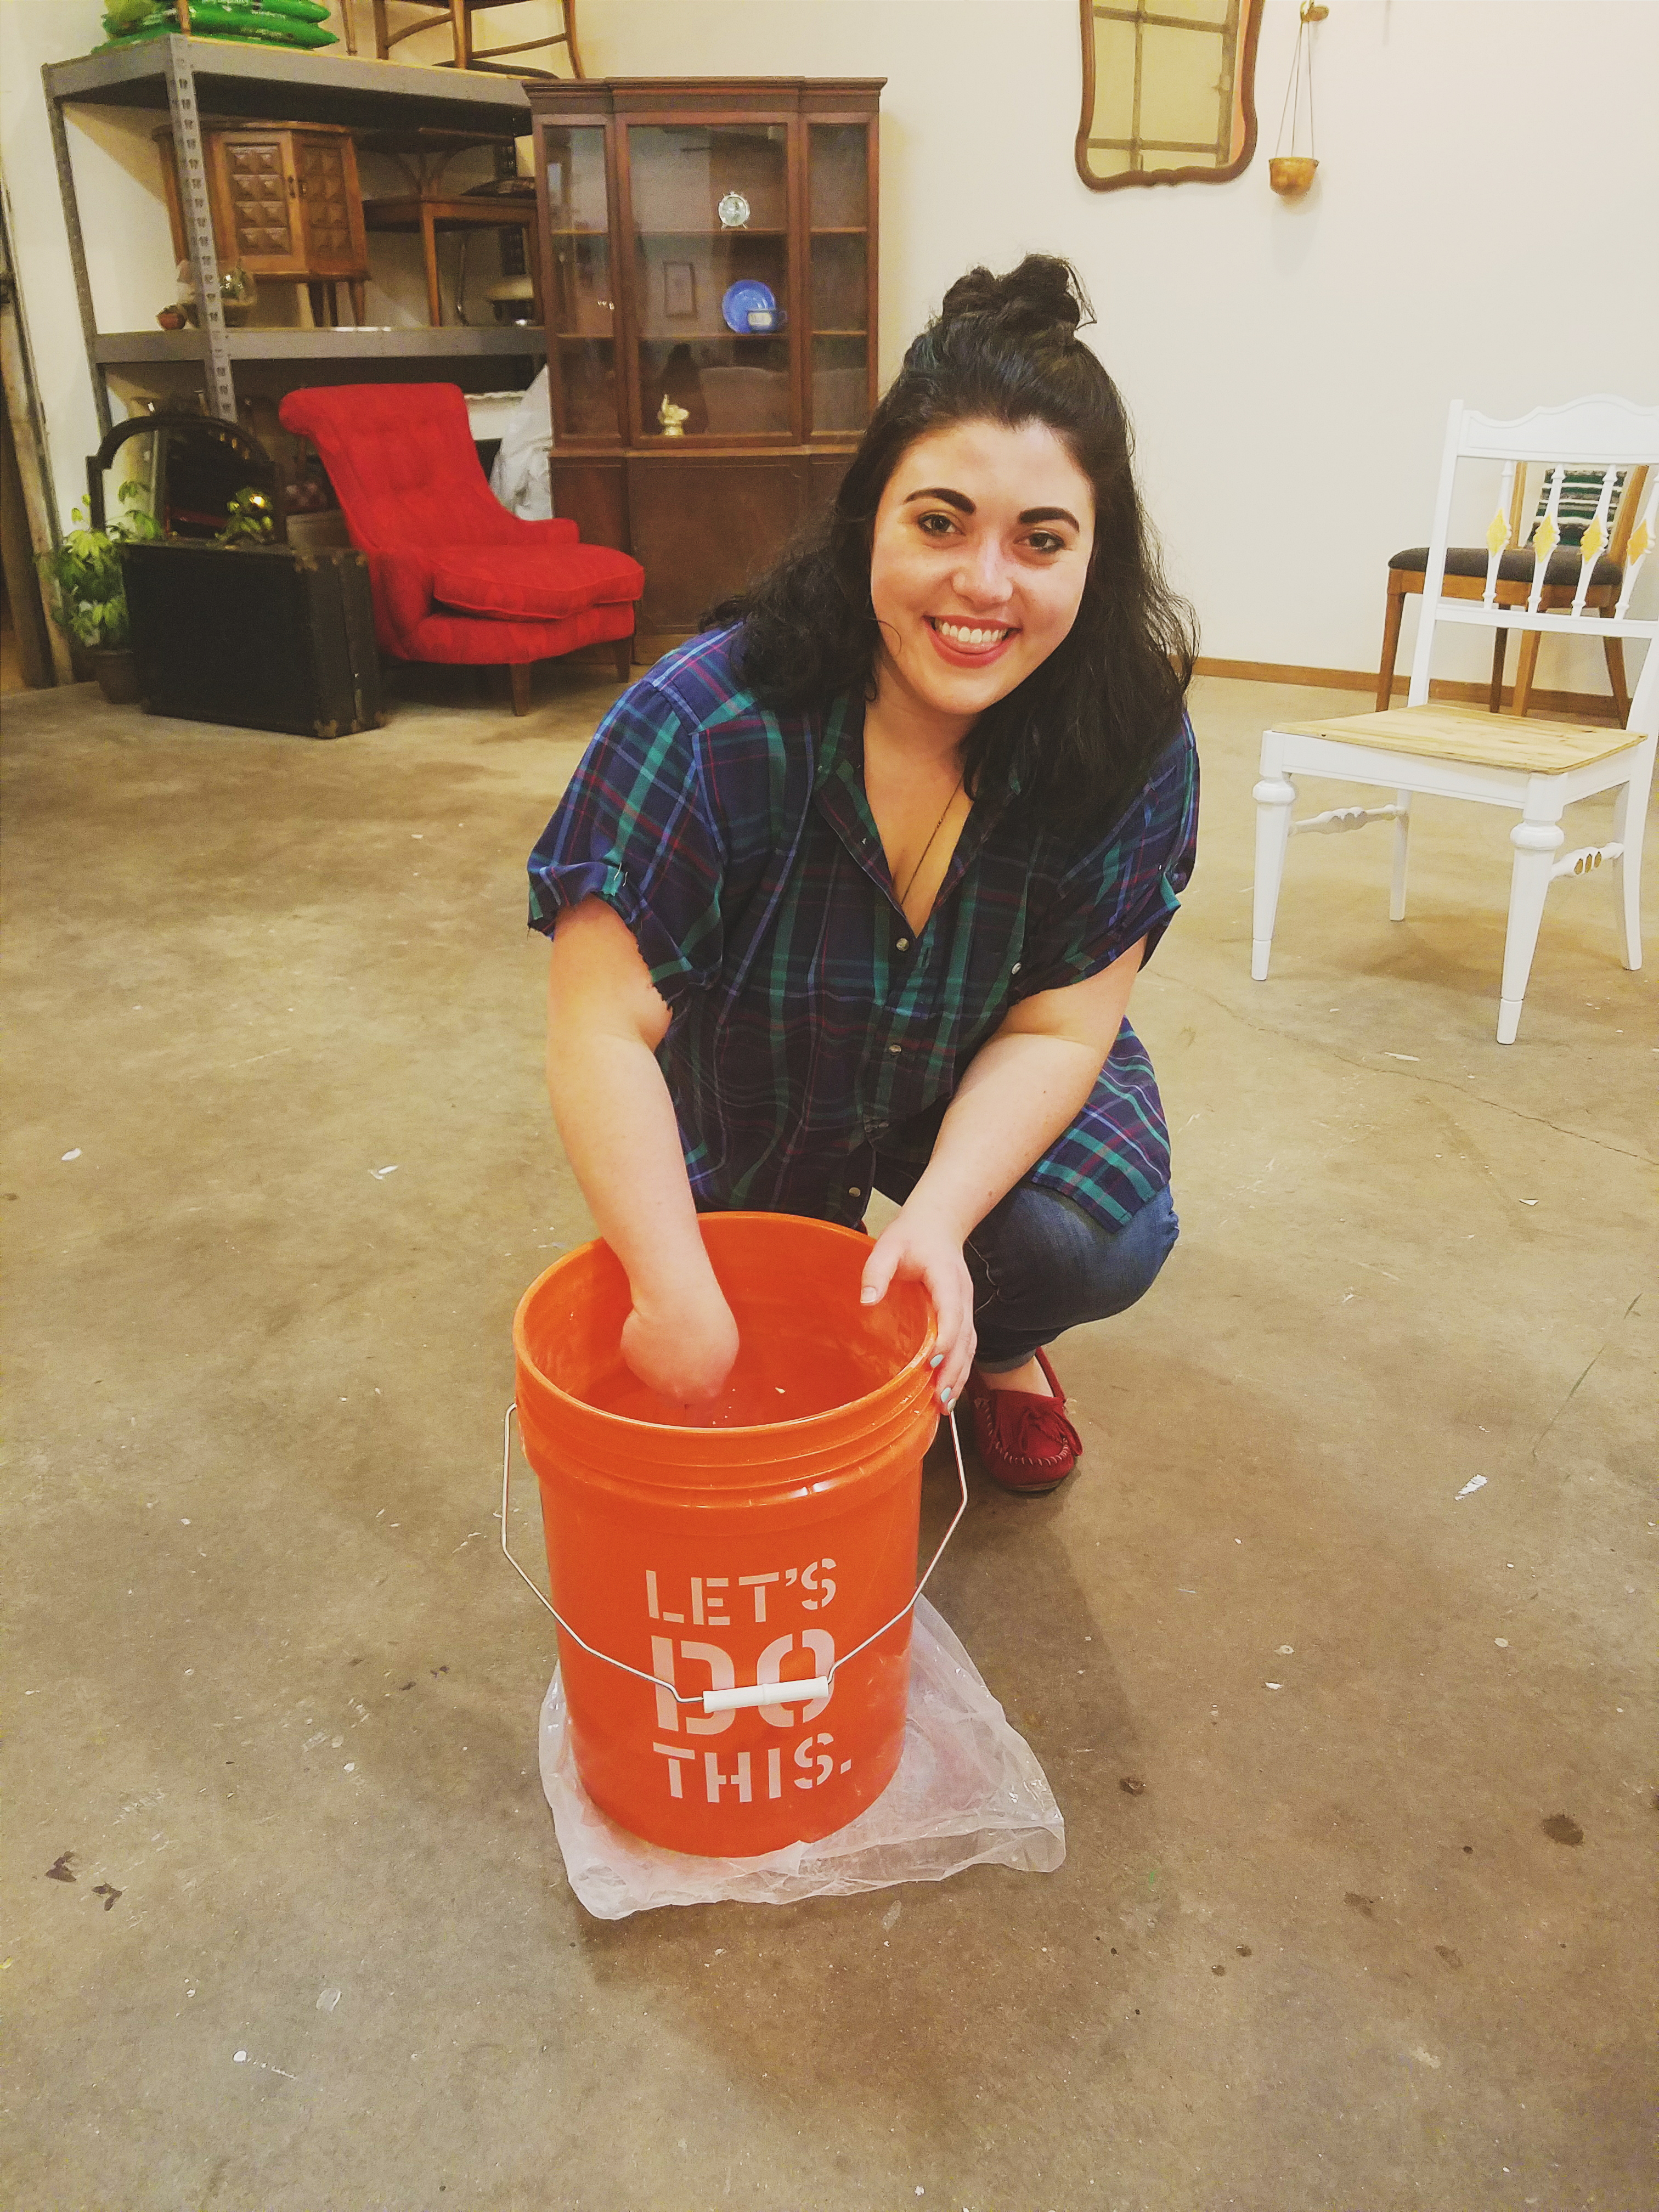 You can prepare the whole package to make a bunch of DIY Succulent Planters, or just 1/4 of the package if you only want to make a few. Make sure to follow the specific instructions on the back of whatever brand of concrete you buy.
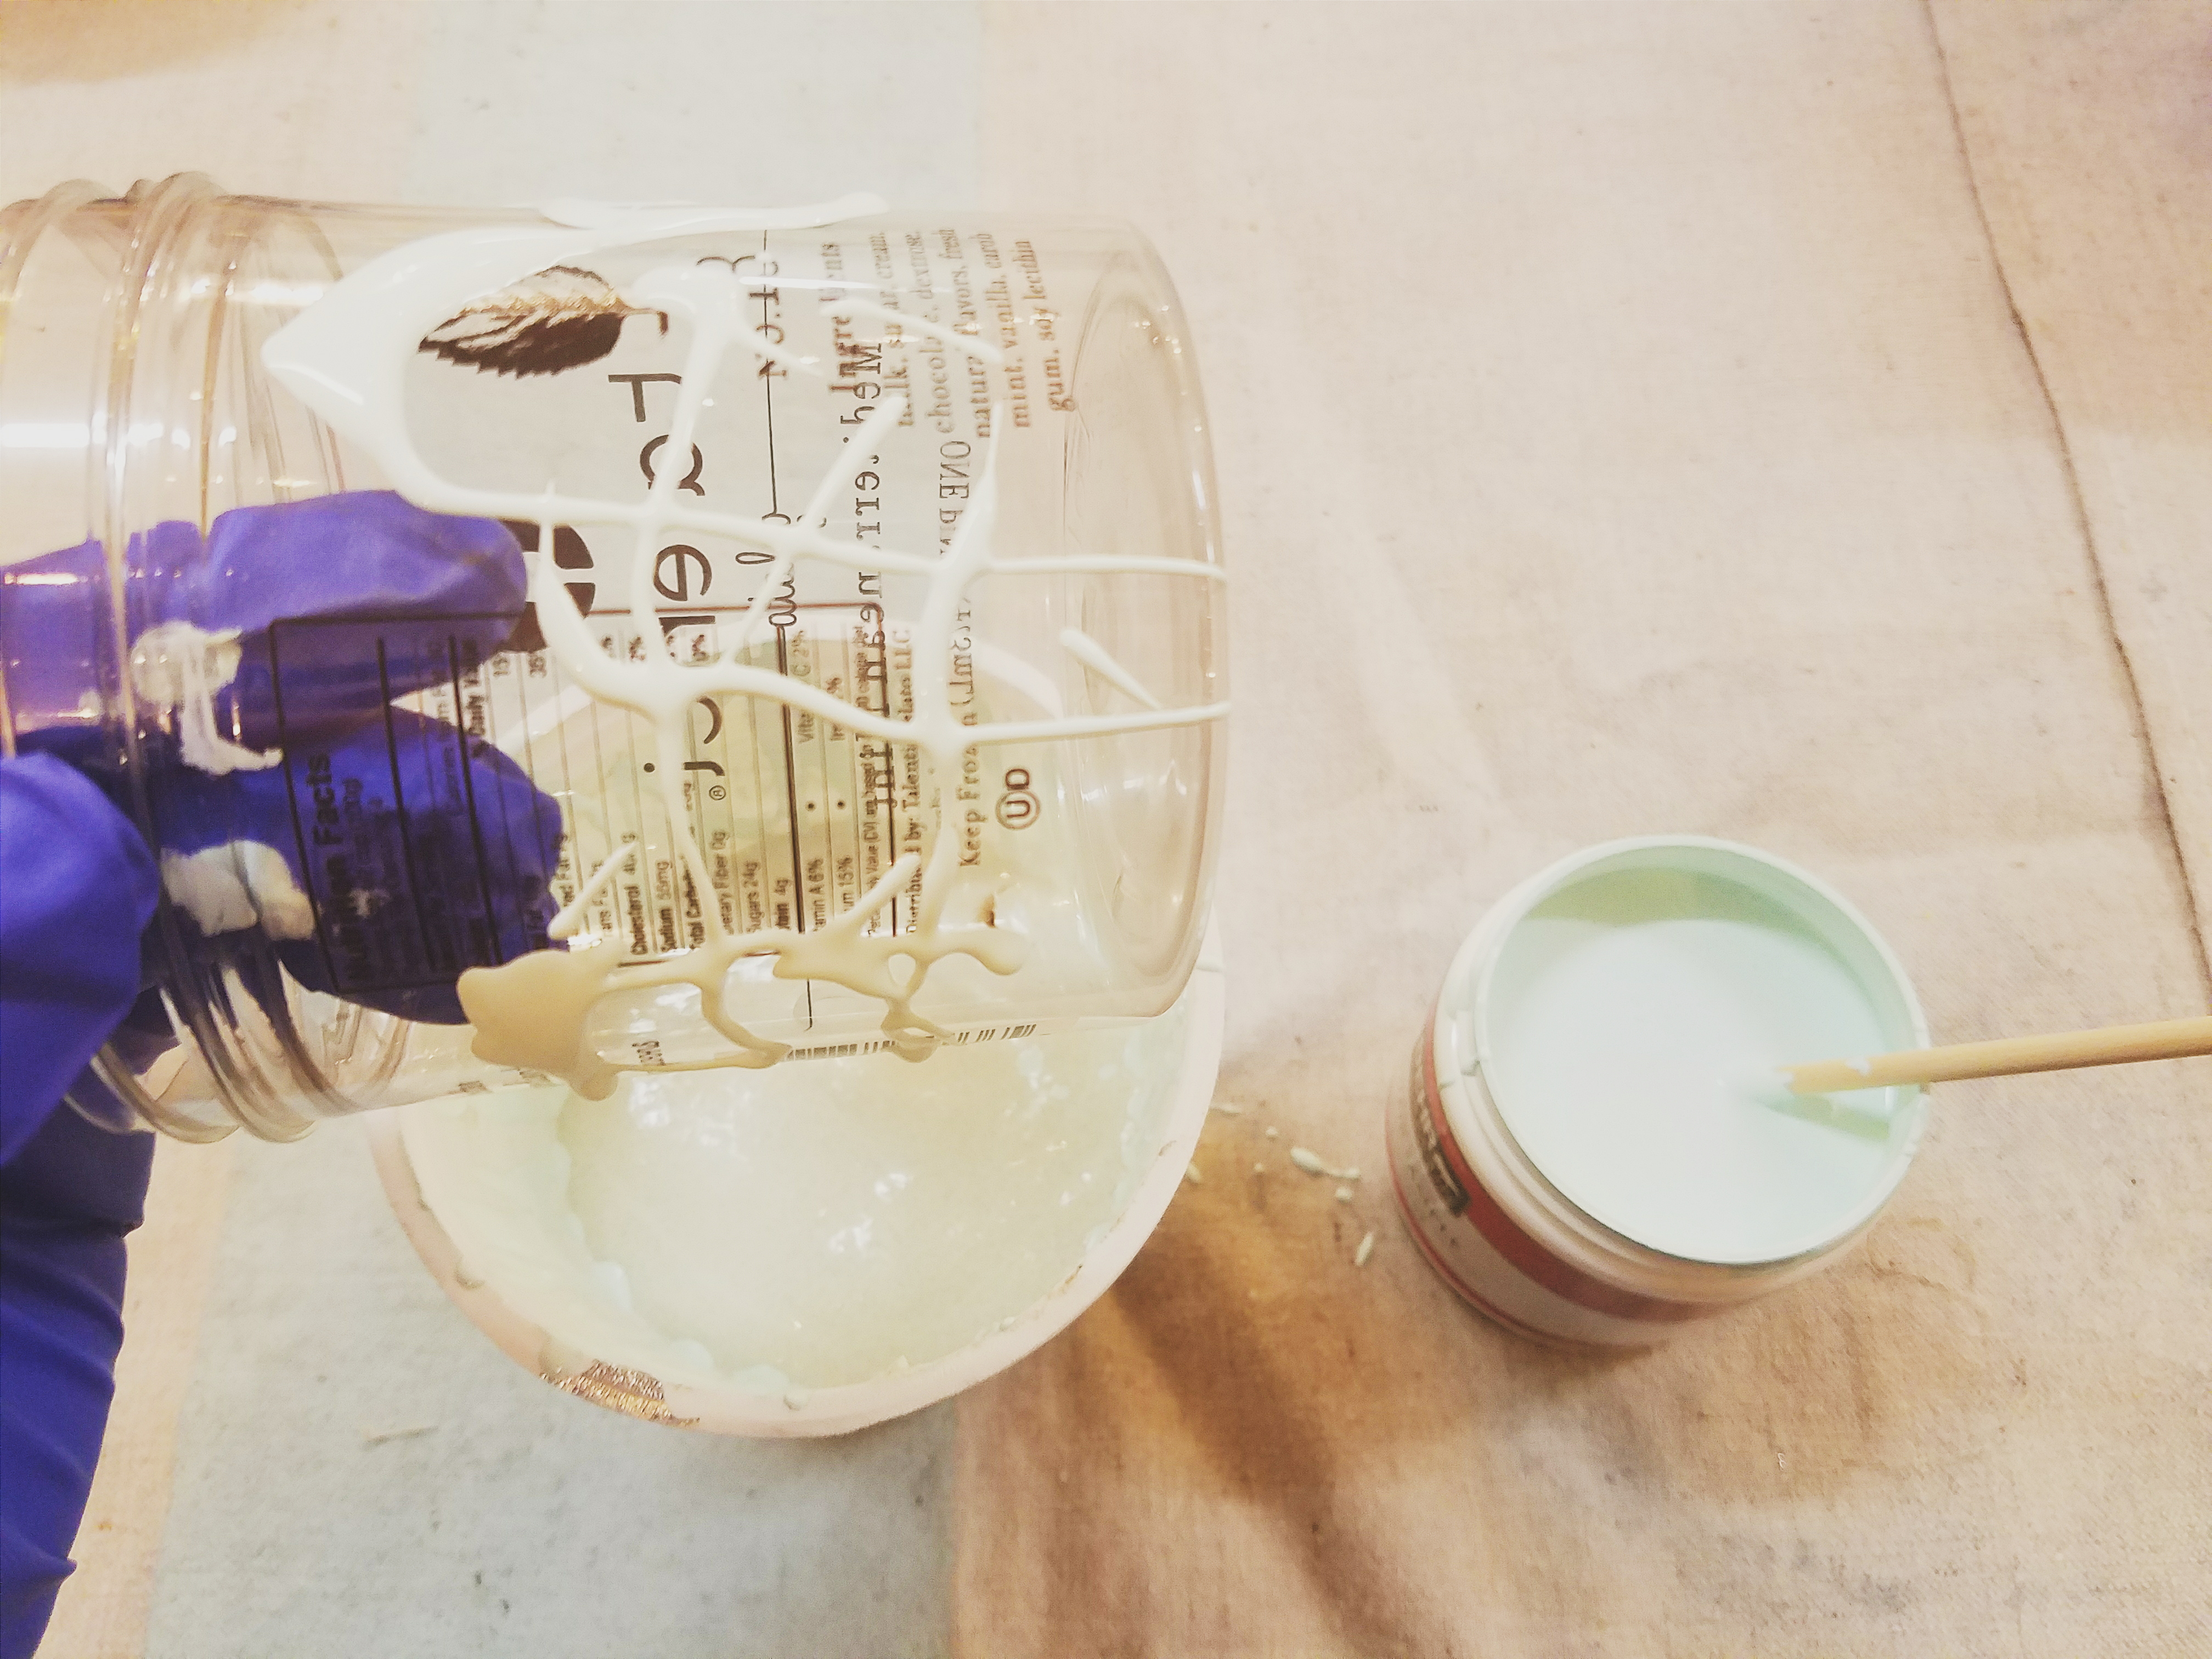
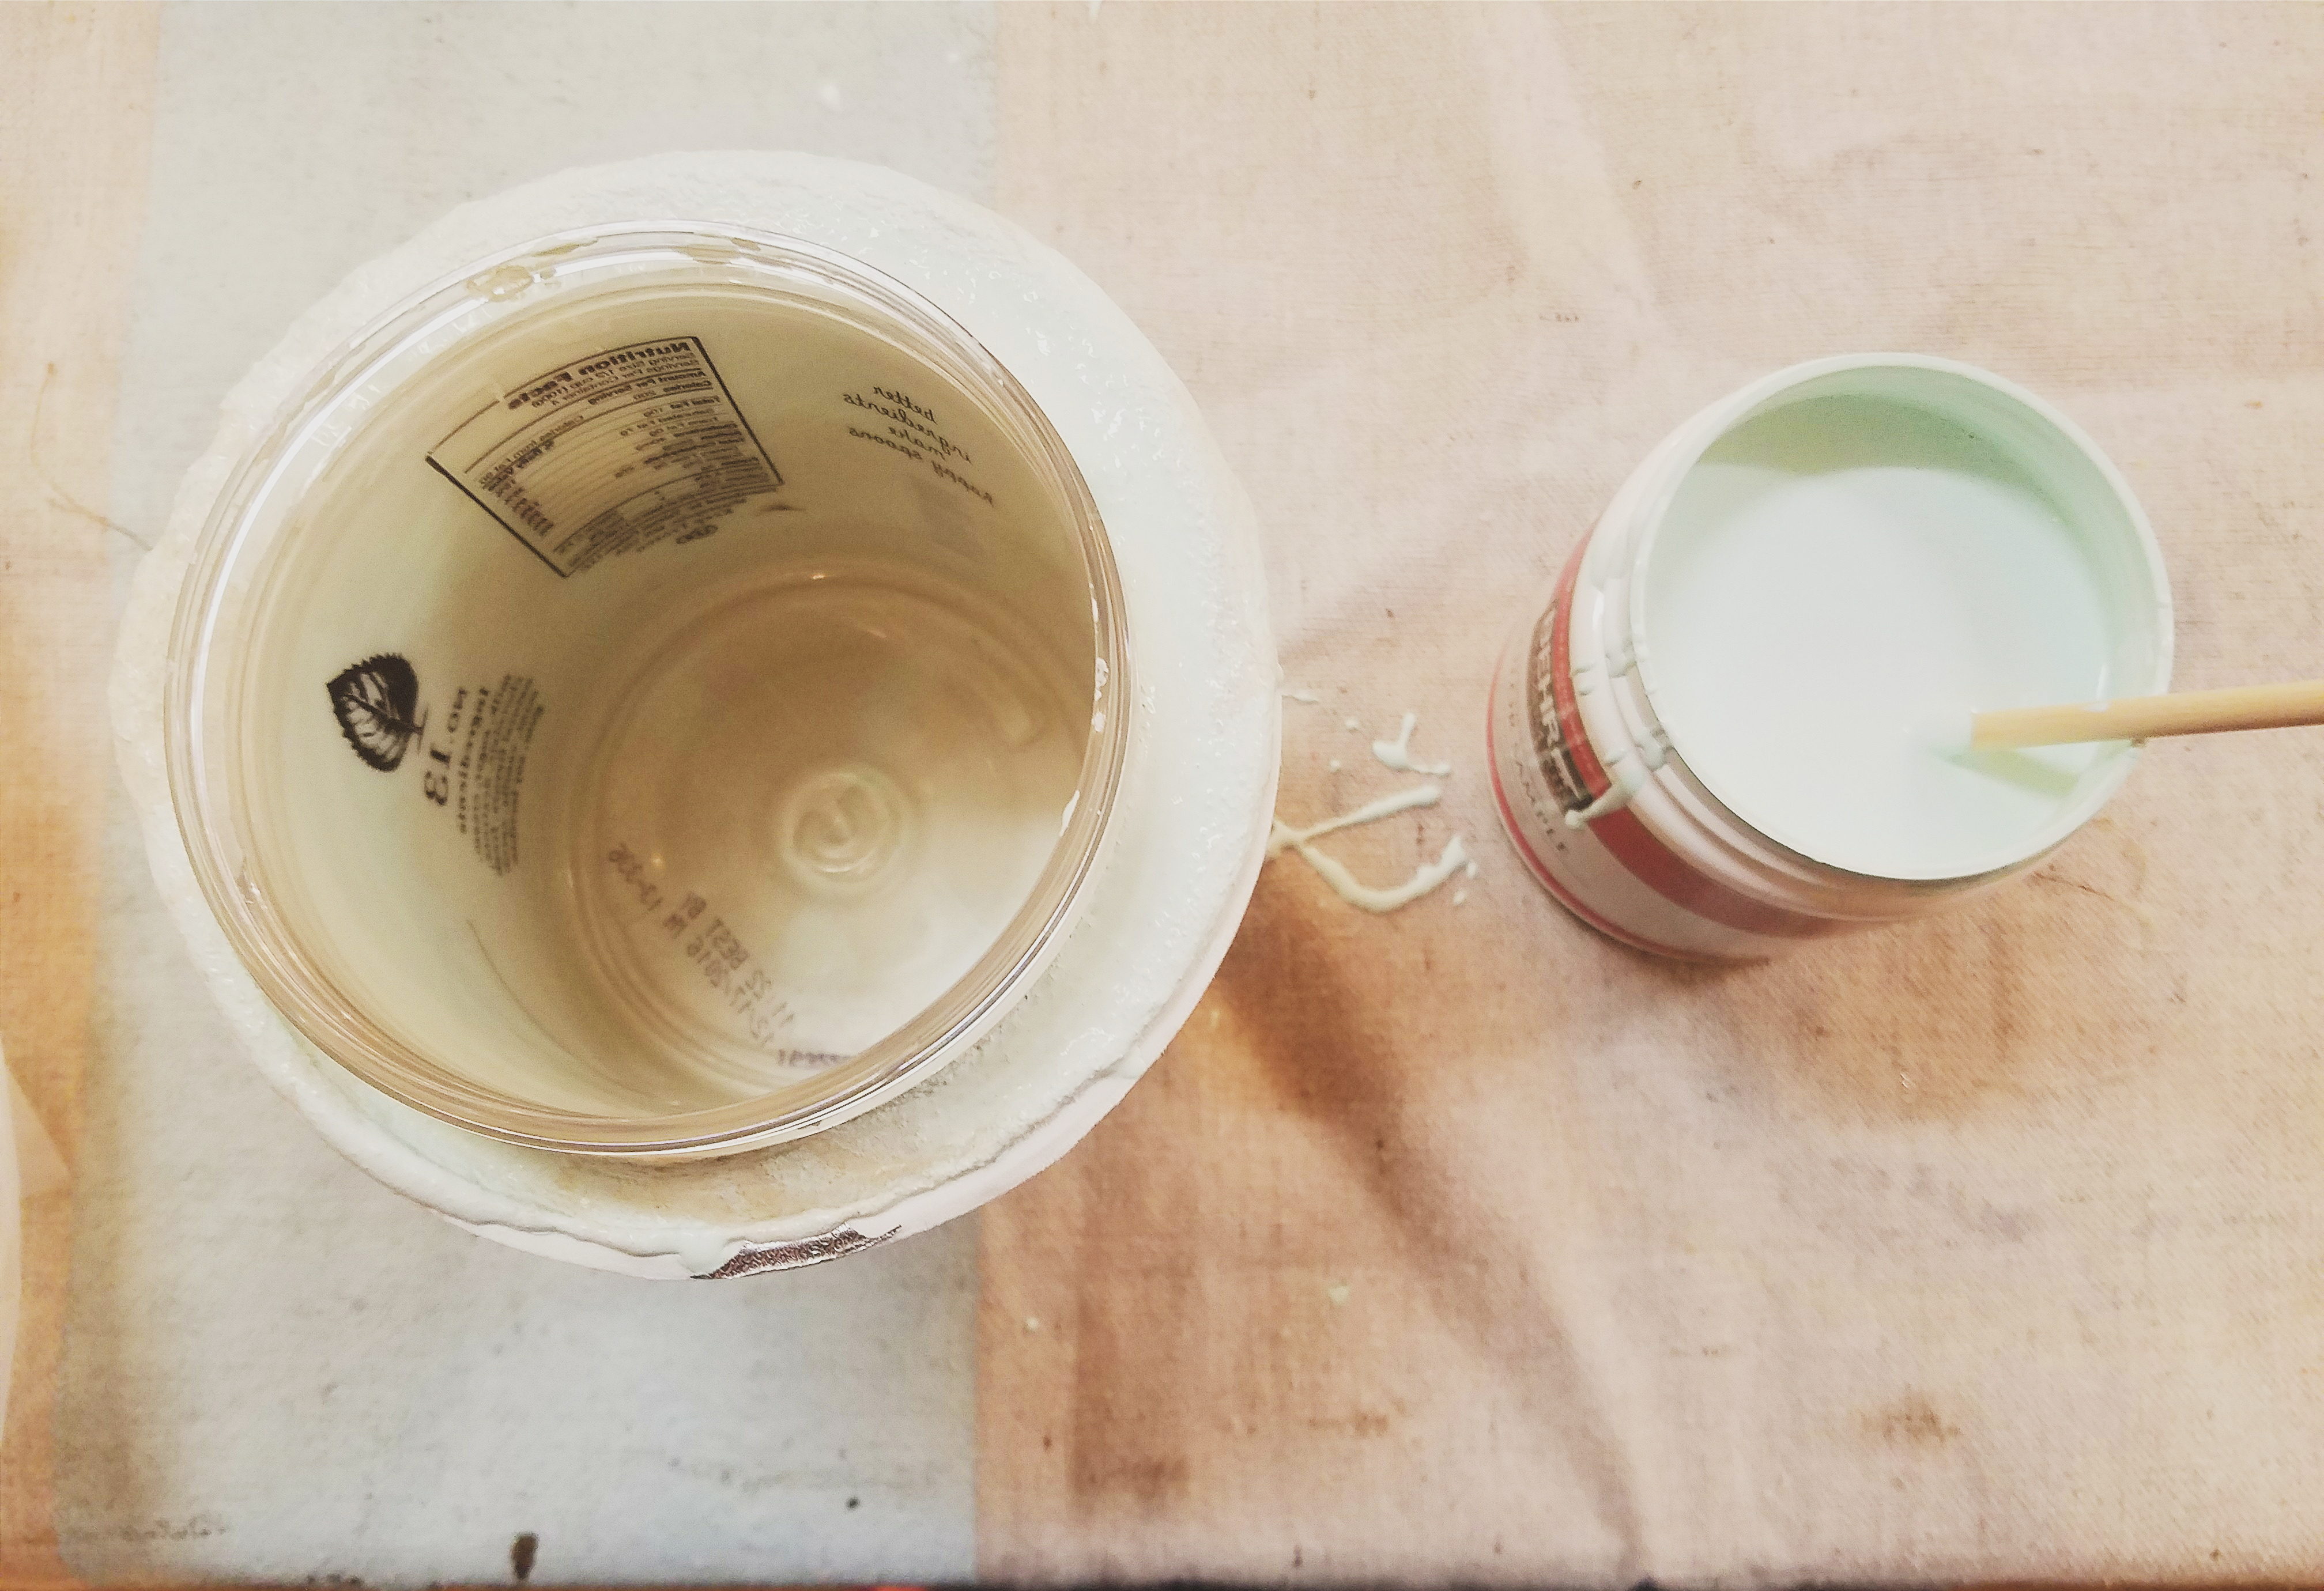
Step 2: After your concert is mixed, take your larger plastic containers ( 32.oz yogurt containers are a perfect larger size) and drizzled paint on the inside of them using the eraser end of the pencil. You could also use an old paintbrush or wooden spoon handle for this step!

Step 3: Take your slightly smaller container (gelato or plastic drinking cup sized seem to work best) and drizzled paint on the outside of it too. You can use two separate colors or the same color as what was drizzled in the larger container in step 2. Set smaller container aside.
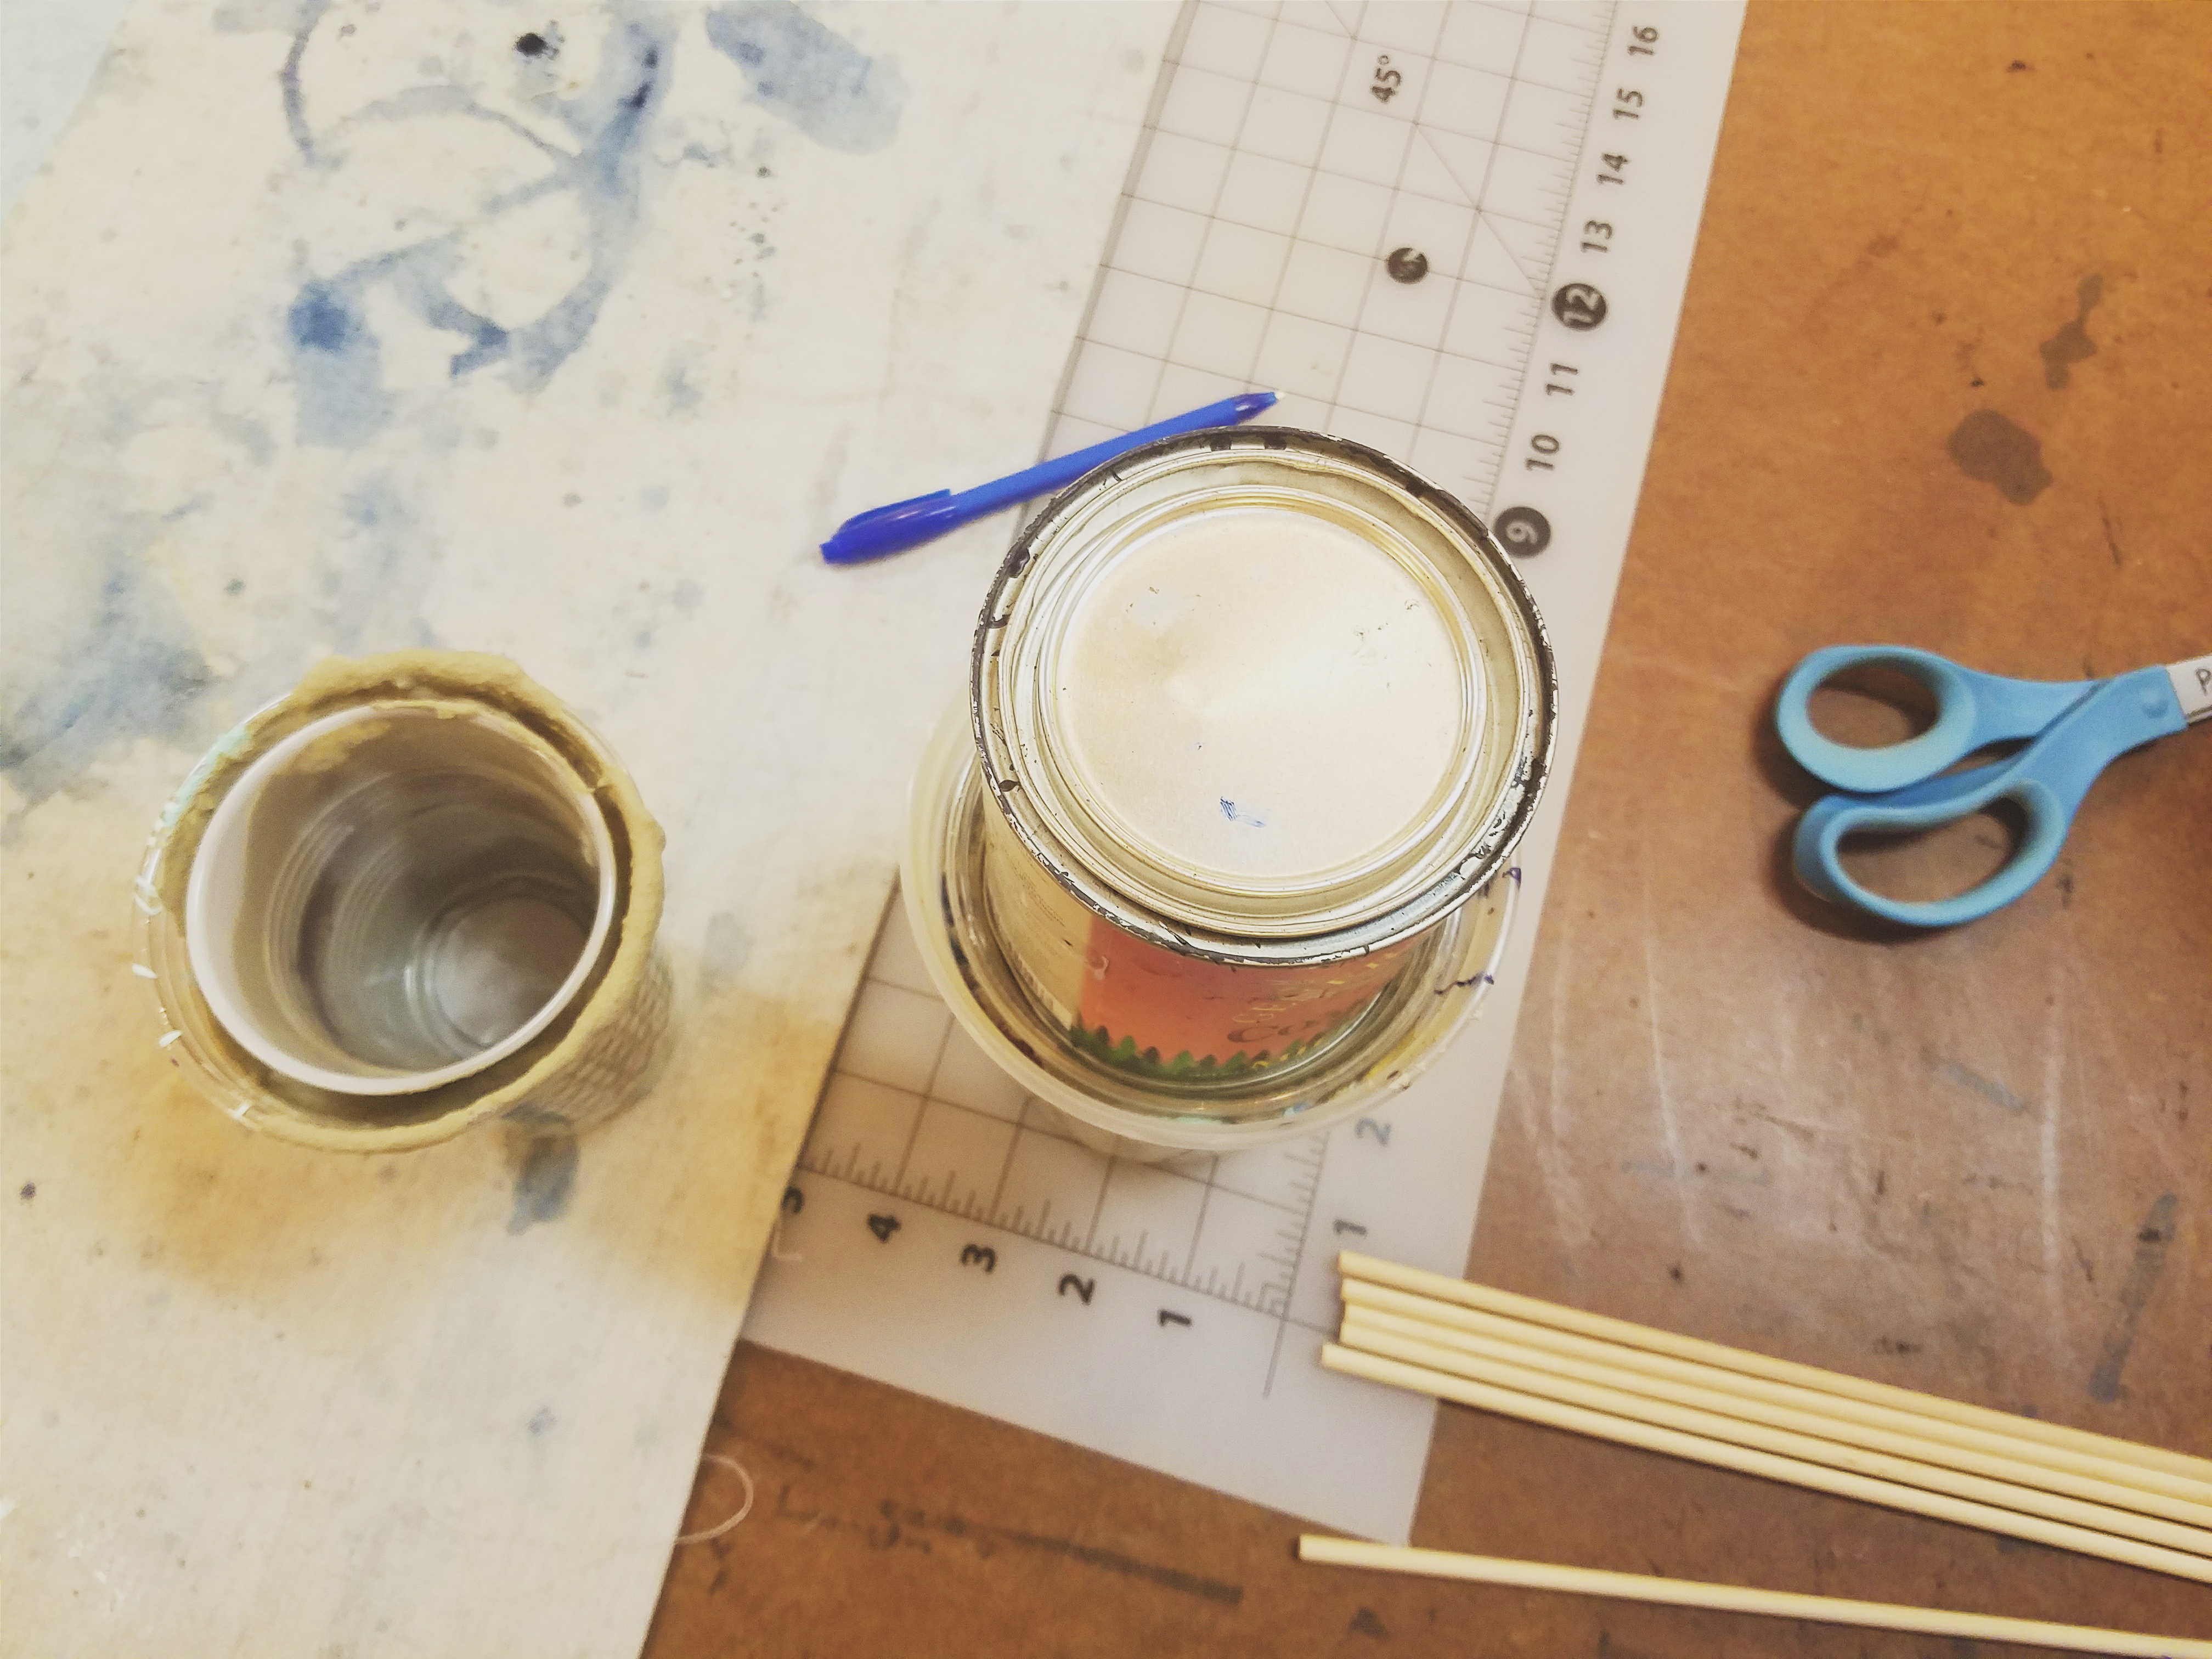
Step 4: Poured your concrete mixture into the larger container until it was filled about halfway. Then take the smaller container and press it into the center of the concrete in the large container.
Step 5: Set something heavy, like a stack of books, paint can, or small weight on top of the little container. This will keep it from rising up or moving around in the concrete.
Step 6: Wait the required amount of time for your concrete to set based on the package instructions. Don’t be alarmed if your containers feel very warm as the concrete is setting.
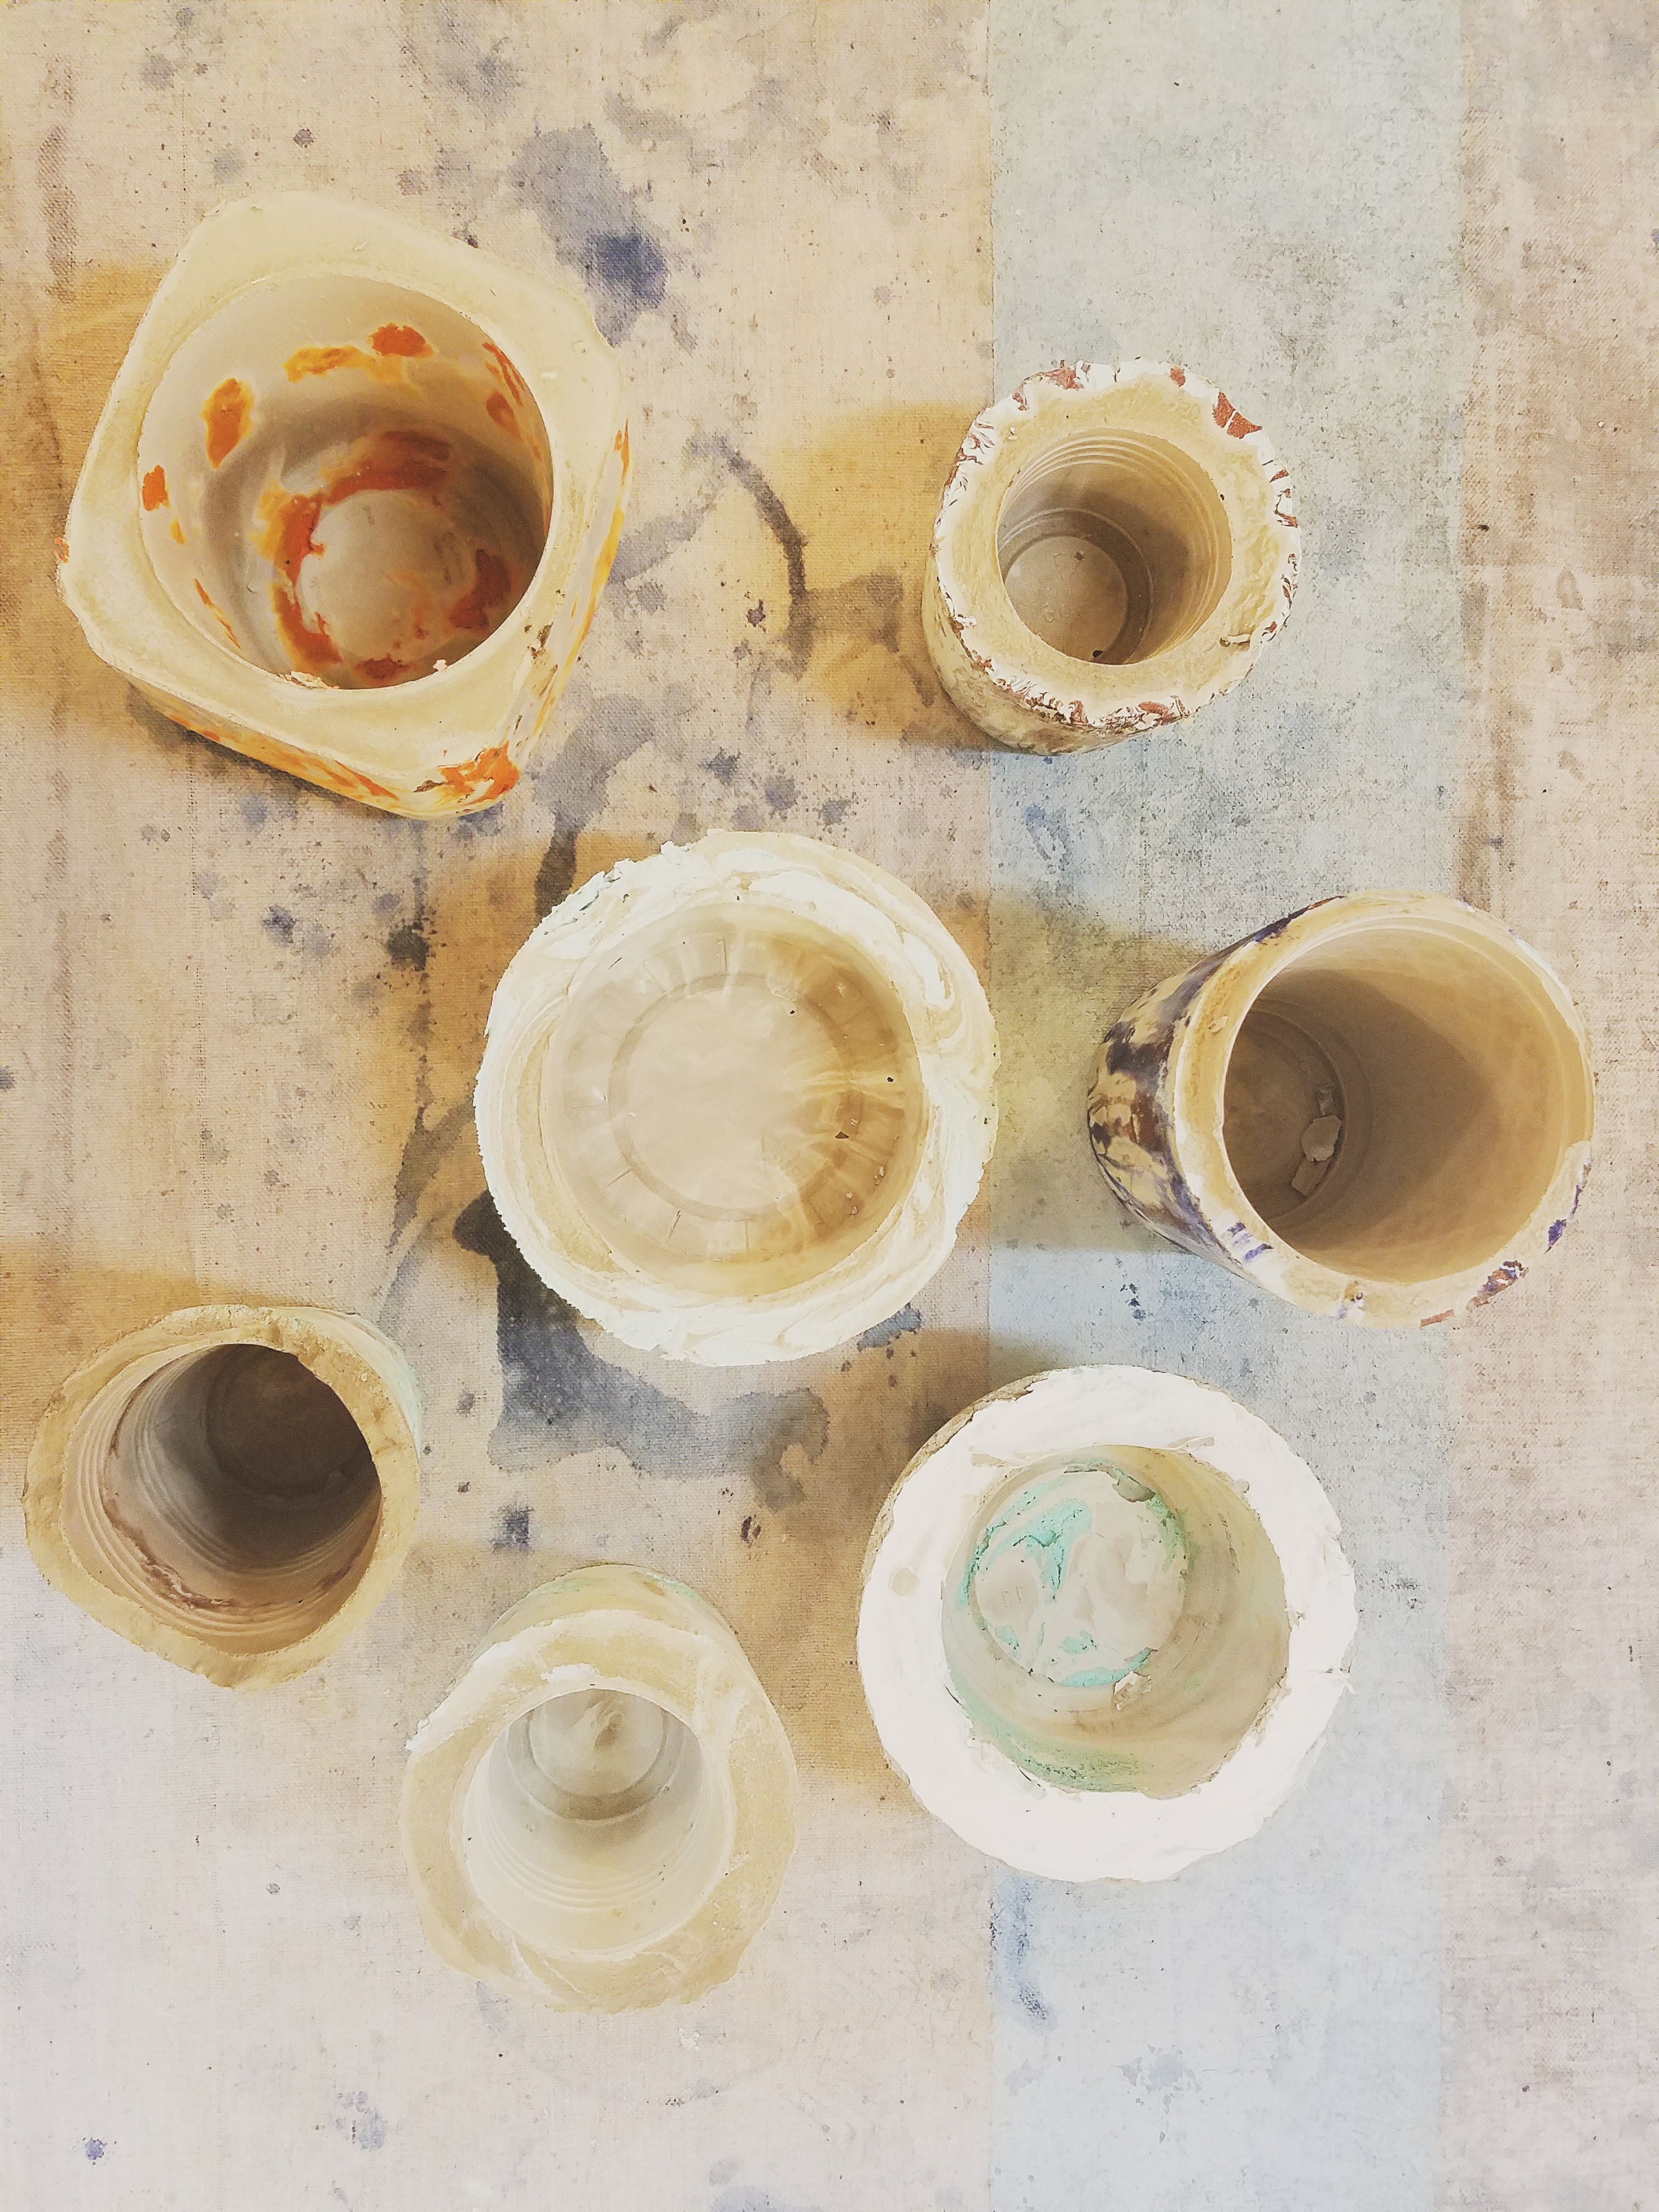
Step 7: Once the concrete is set, smoosh in your small plastic container and pull it out from the middle of the large container. You may need break or cut the small container to get it fully removed. Finally, cut down the side of your large container and tear it away to reveal your new DIY Succulent Planter!
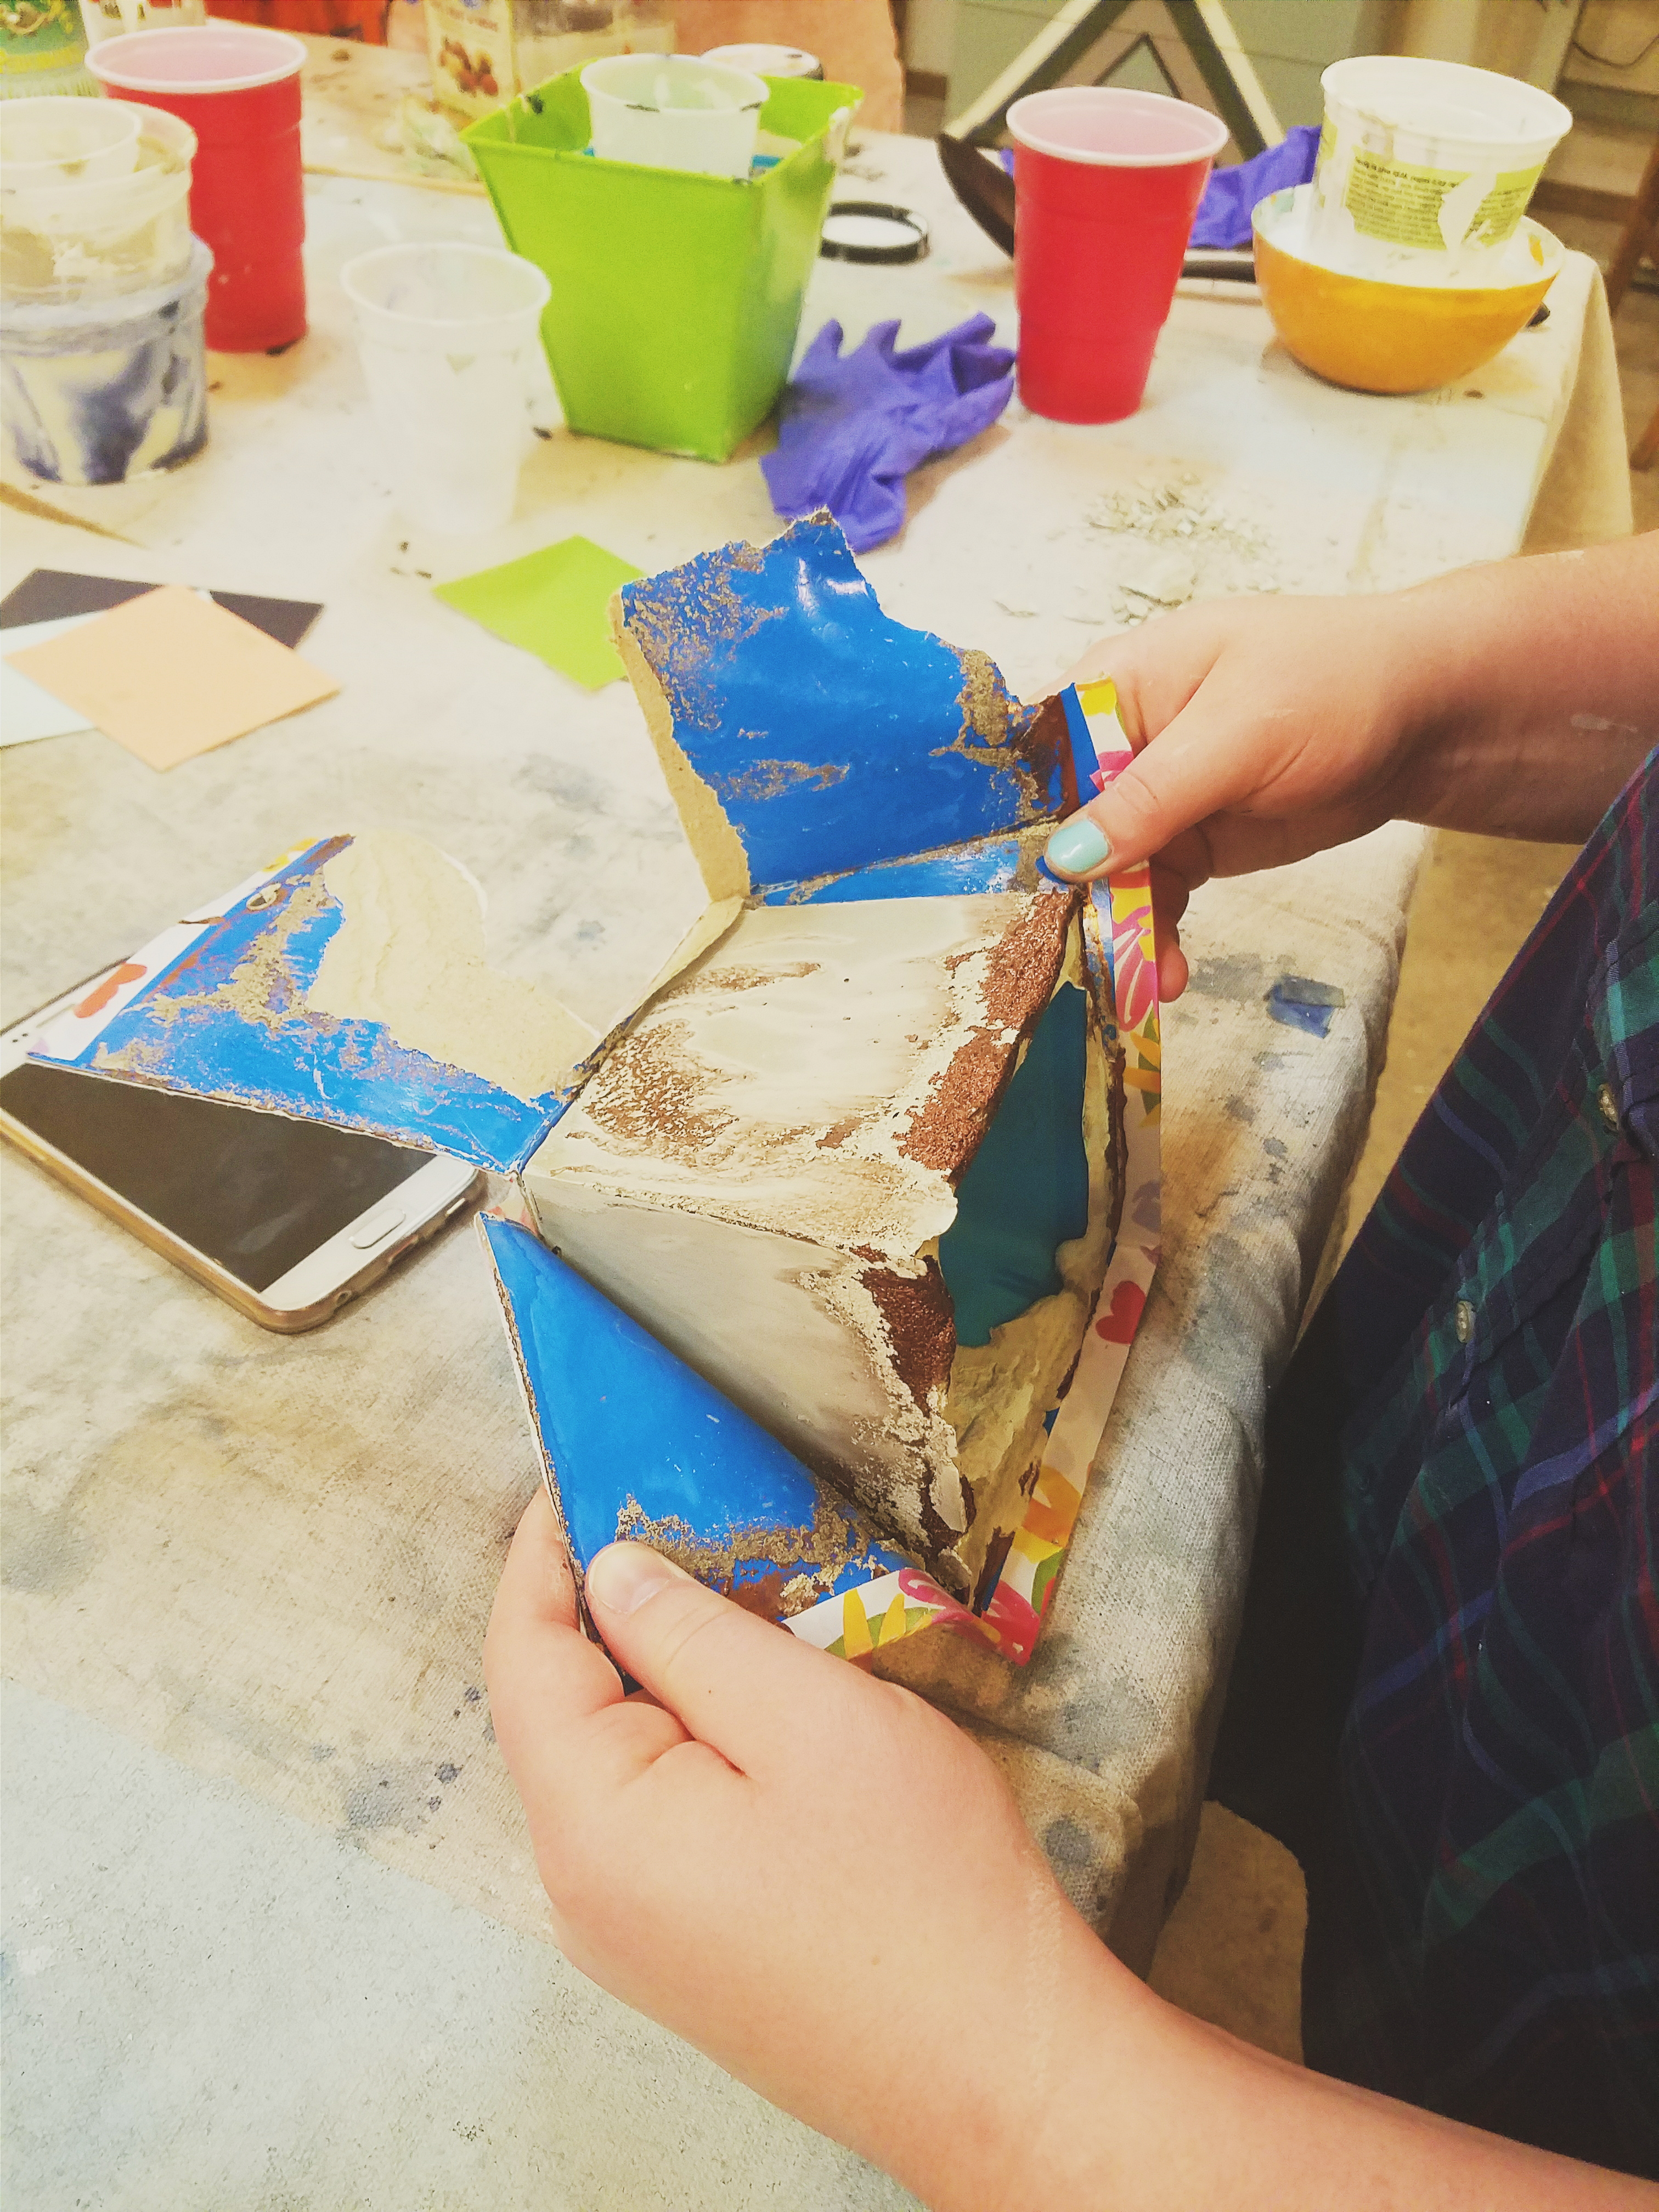
You can experiment with different types of container sizes and shapes. Soft plastic ones are the easiest to use. While you can also buy cardboard containers at the Dollar Store to complete this project, it’s easier (and cheaper) to just recycle plastic food containers that you already have.
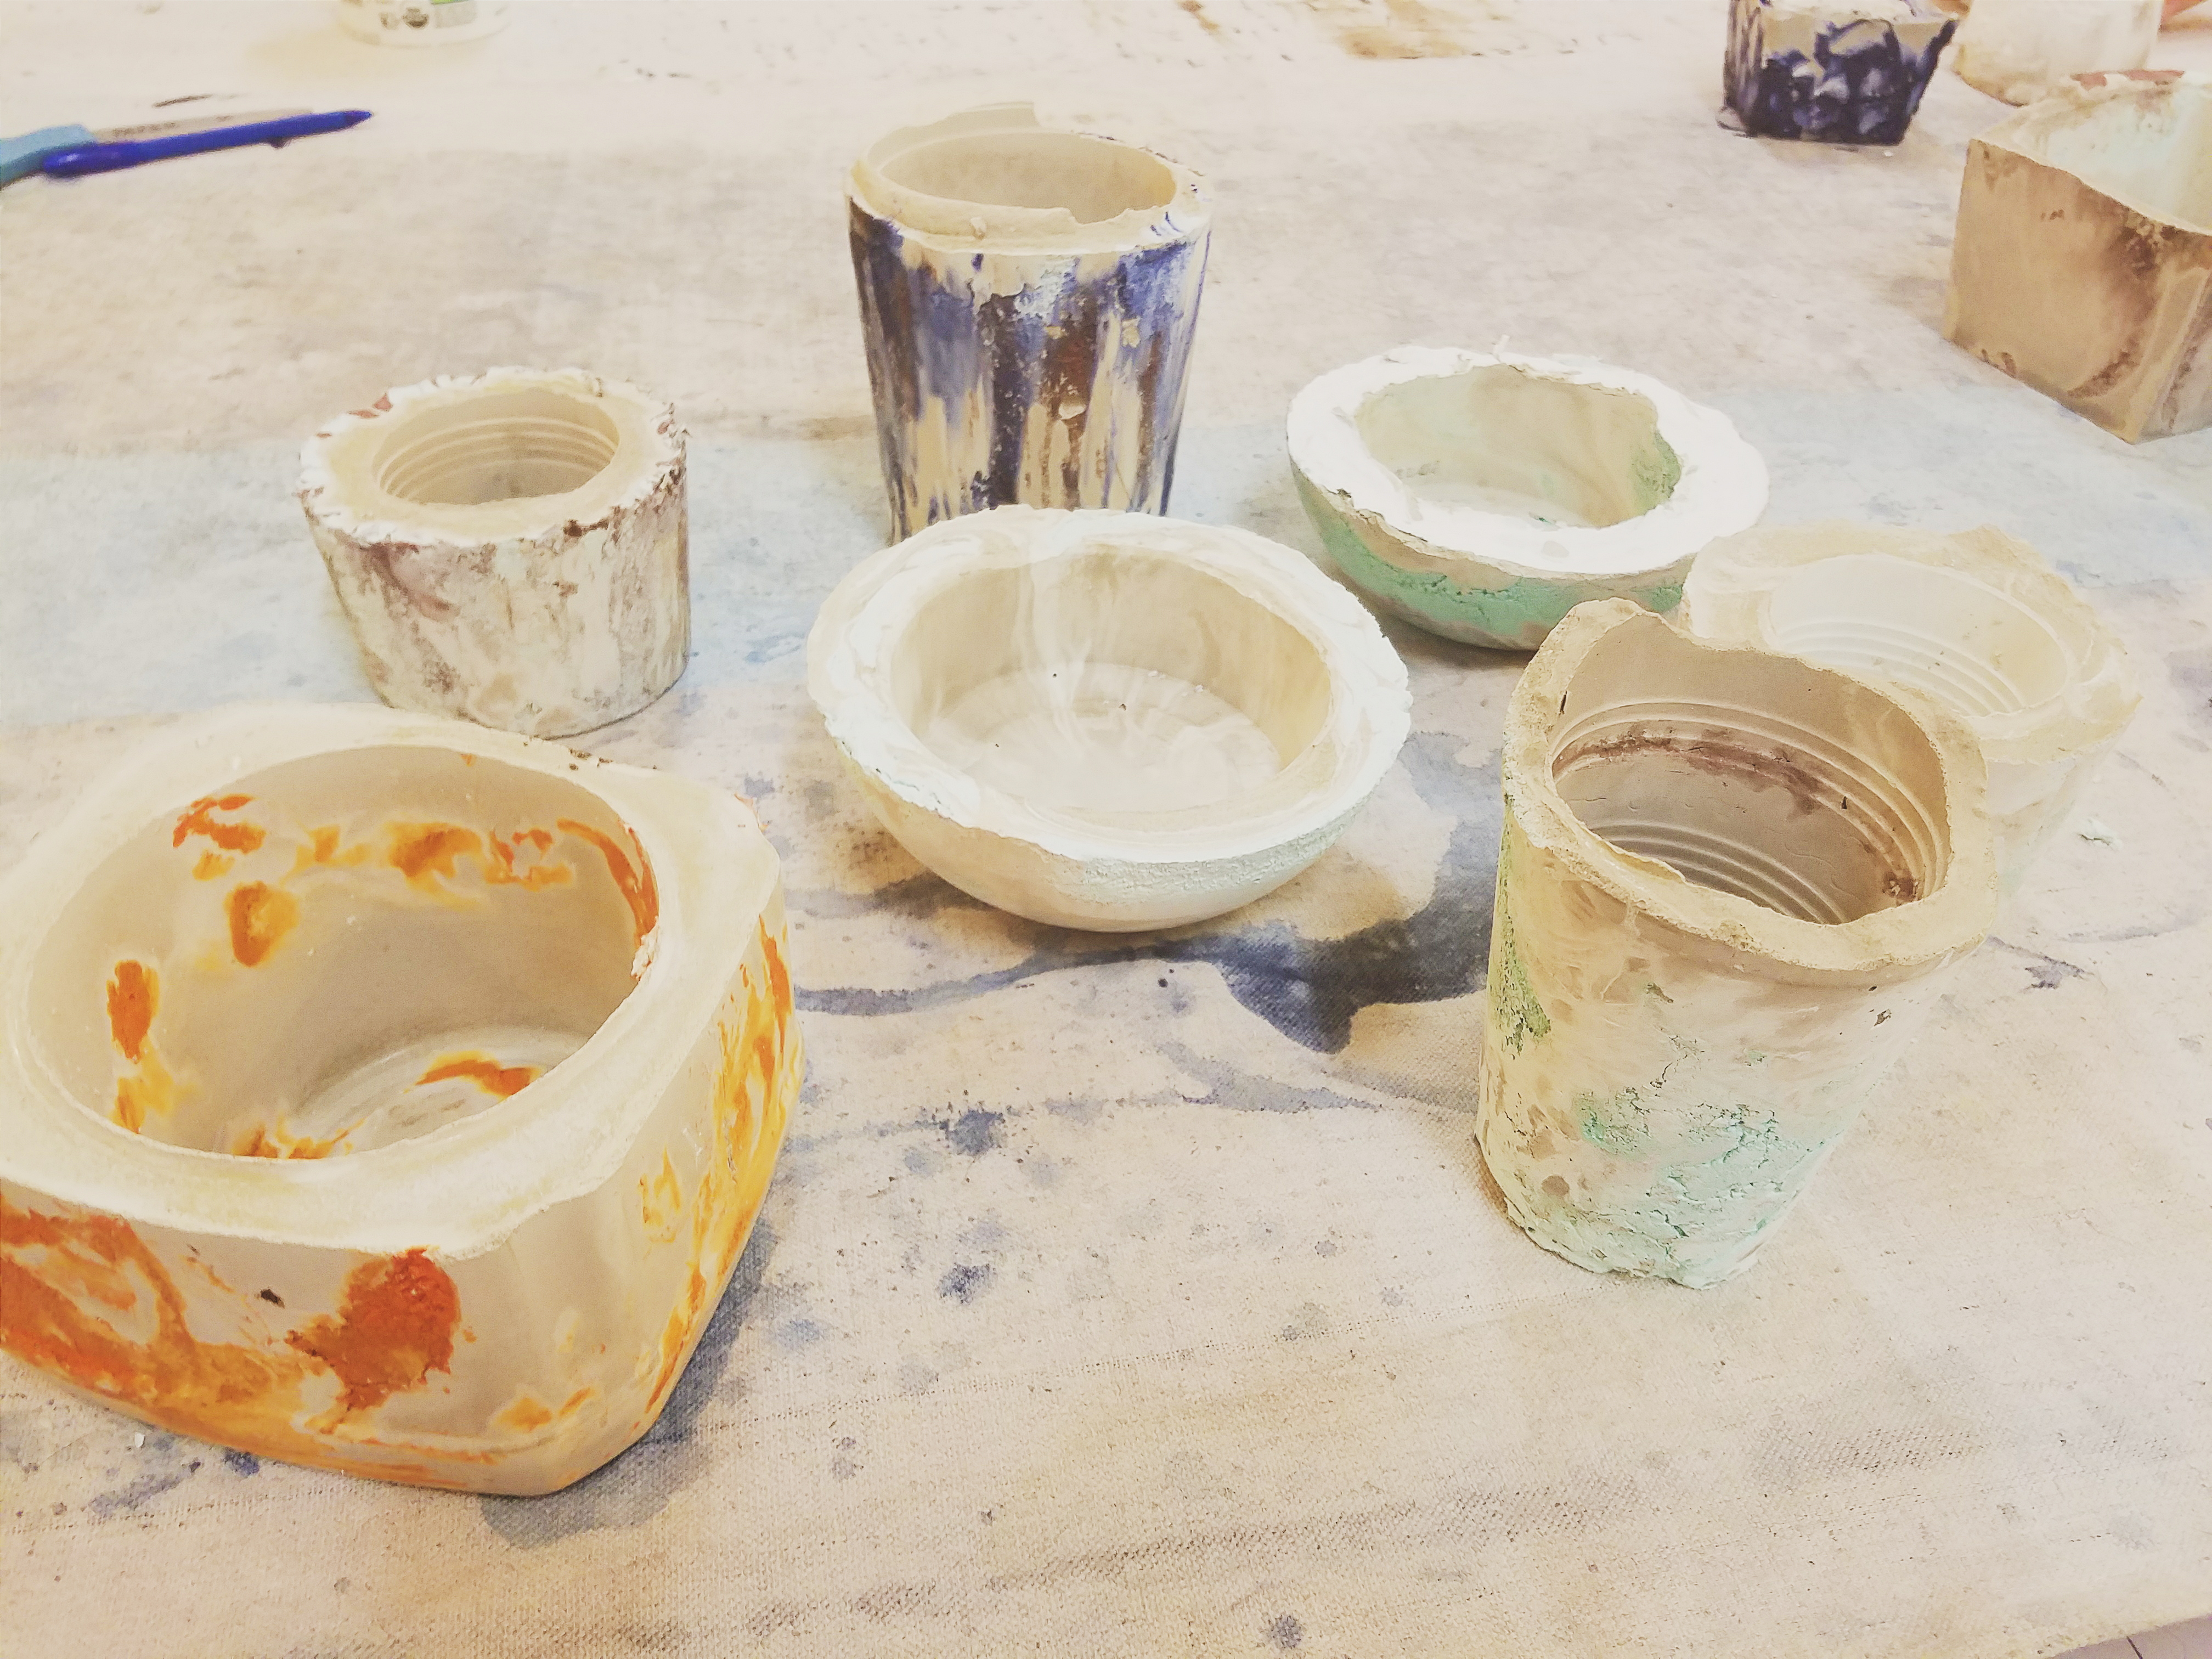
Step 8: After the planters have set for a full 48 hours use the sandpaper to file down any rough edges. You can also just leave the edges if you prefer a raw textured look.
And there you have it, pretty, custom DIY Succulent Planters. Similar planters go for upwards of $59 dollars at Create & Barrel or Anthropology.
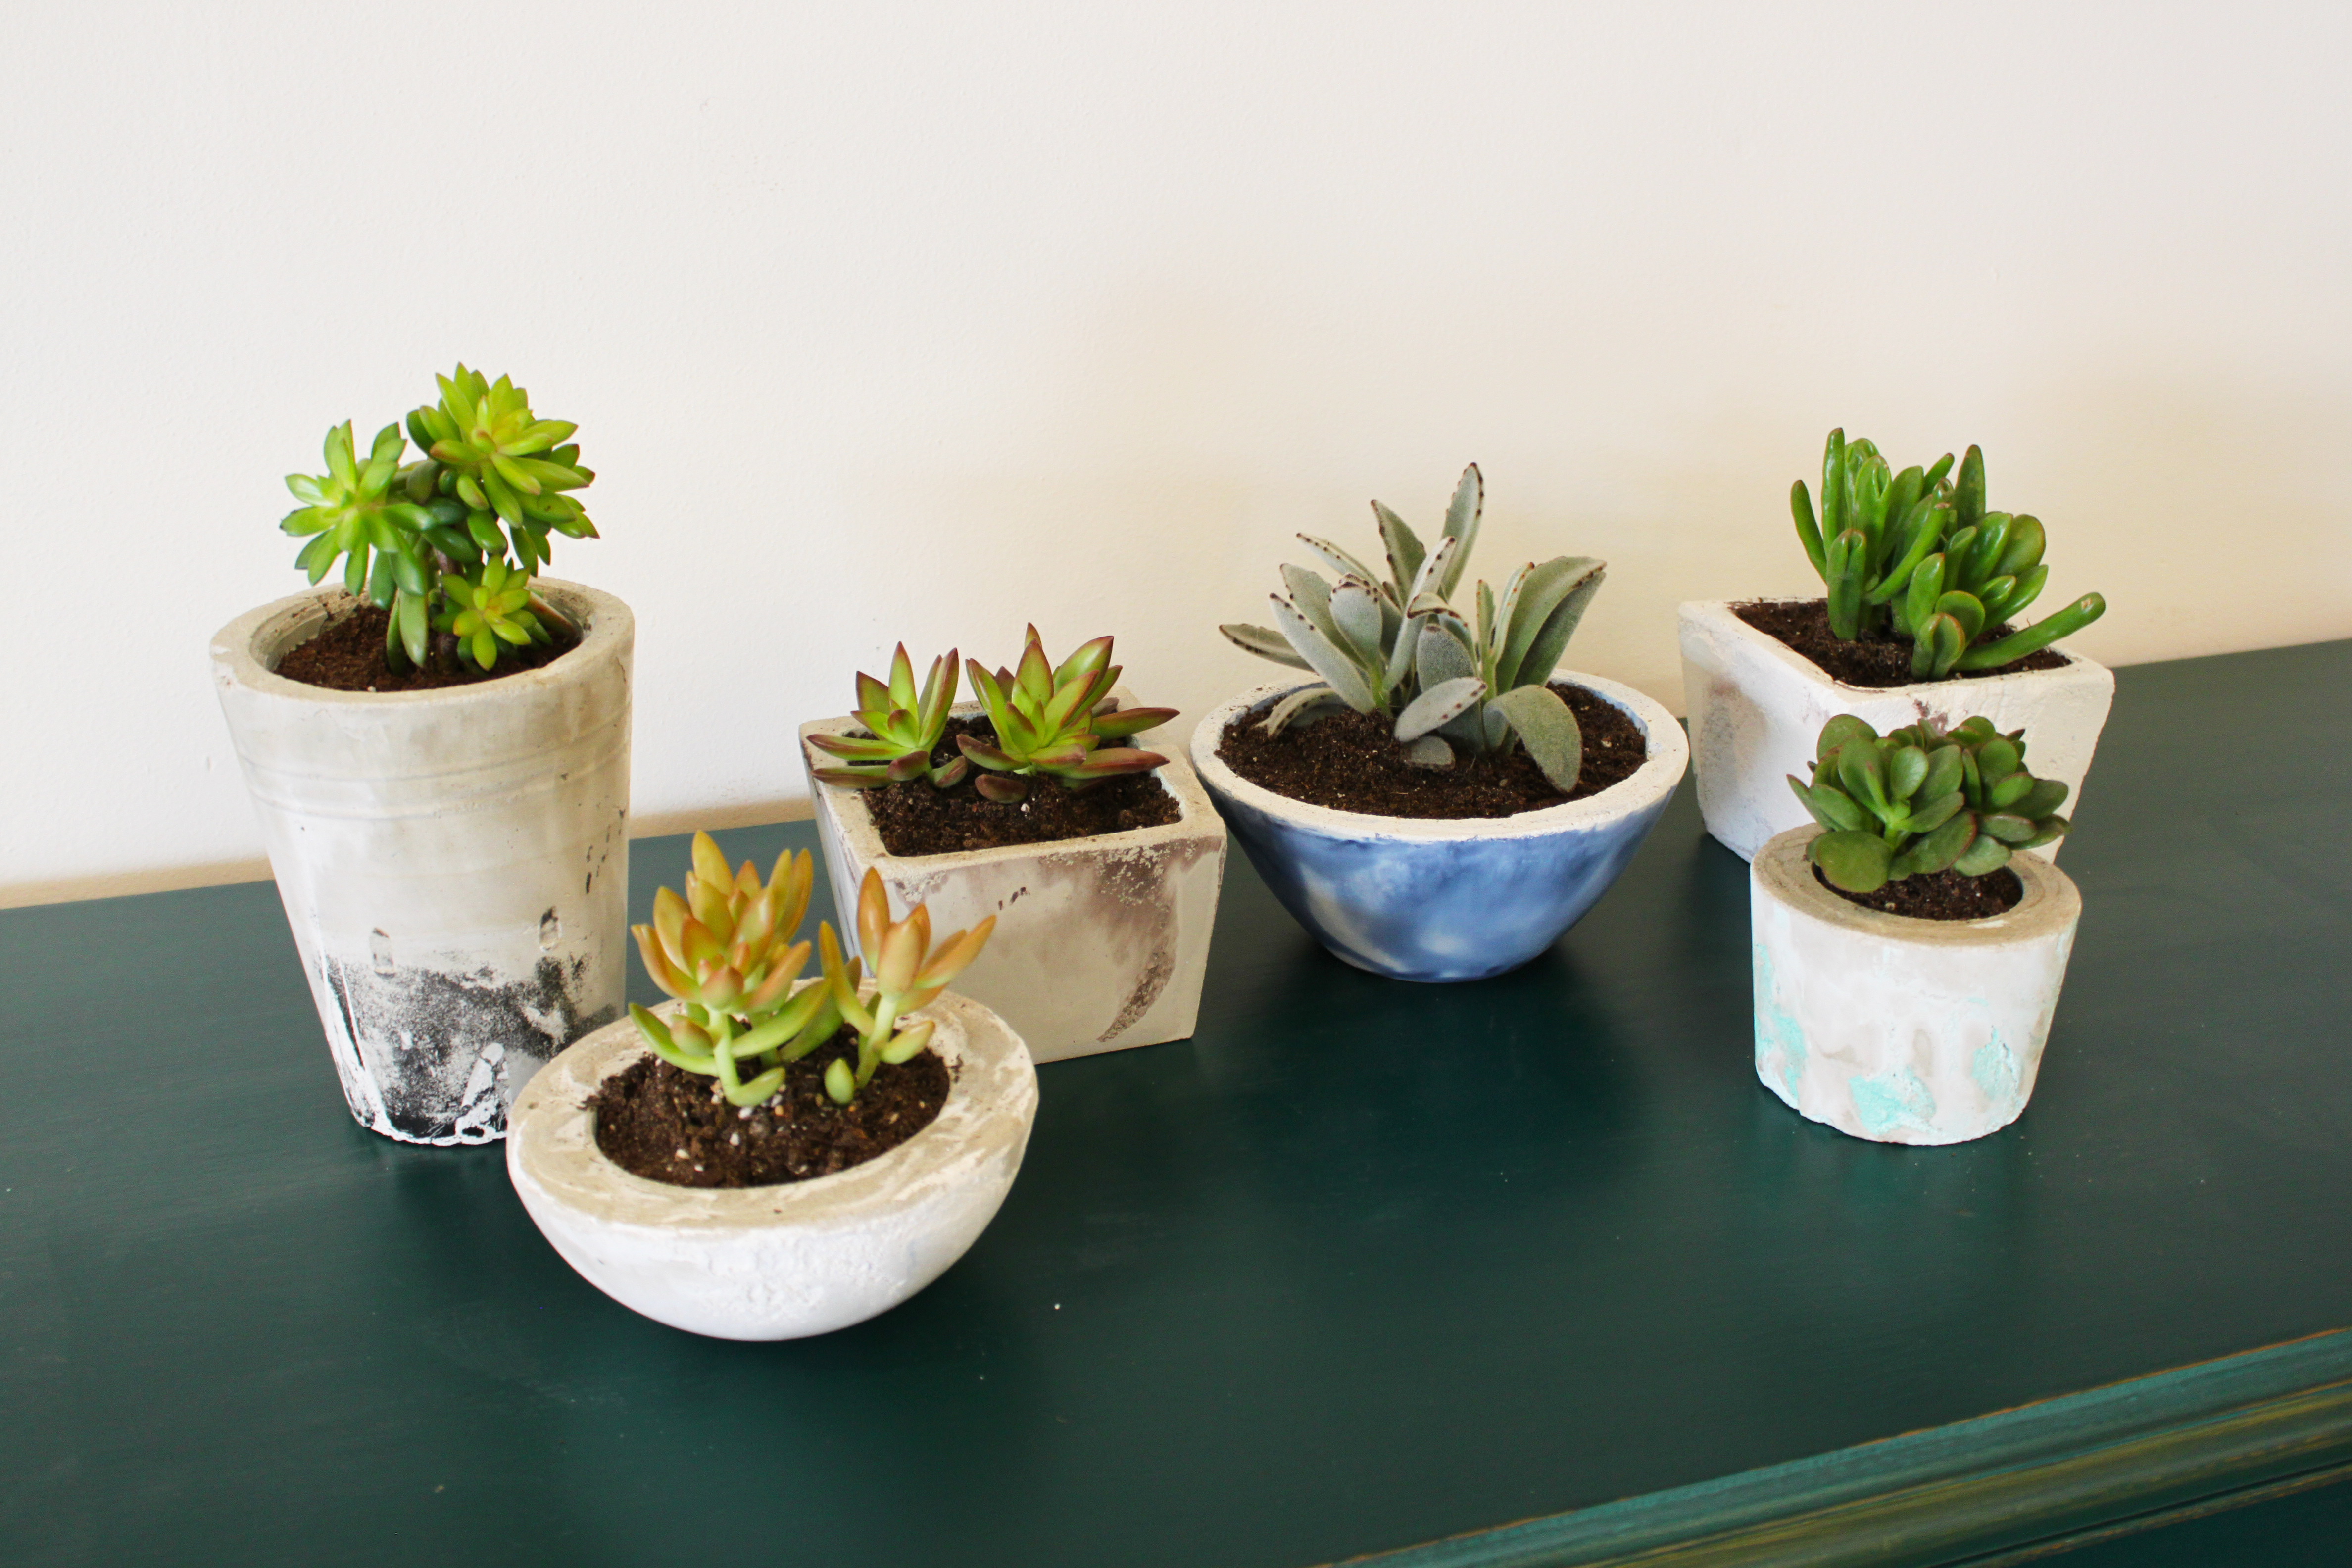
Why not save the environment, and some serious bucks by making DIY Succulent Planters of your own!

